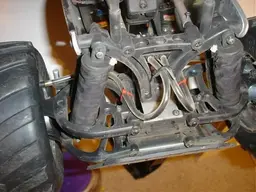
My monster truck overhaul

This site may earn a commission from merchant affiliate
links, including eBay, Amazon, and others.

allanach

Well-Known Member
Messages
388
Reaction score
1
Location
Brisbane
I have owned the truck from new since the end of June 07, prior to this the Baja 5B is the only large scale I have owned.

Basically I have ran approx. 15 tanks at the most and a lot of the plastic parts have given up the ghost, in a moment you will see the up-grade process and why.

I really enjoy driving the truck and with the help from Kris at www.danielspitstop.com.au it should be a sure thing.

Engine mounts are the very first items that died, causing the engine to move which chewed out a lay shaft gear in no time, the large and small mounts where replaced with alloy up-grades (no pic at this stage).

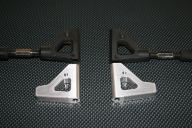
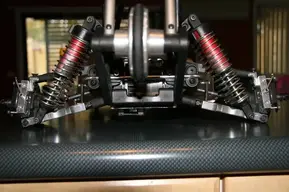
The rear lower and upper arm set flexes like nobody business, which allows the camber turnbuckle to shave teeth from your spur gear, so these have been up-graded to alloy. Pictured below is a set of DPS (Daniels pit stop) upper arms, these arms are hot of the machine and have not received the DPS logo as I just had to have them before the weekend.
mtrearend02.webp
mtrearend023.webp

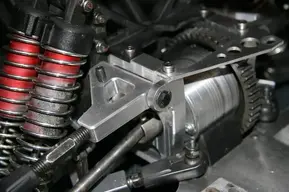
I noticed the plastic diff had twisted and the lug on the left-hand side that the bearing mounts on had snapped clean off, the entire diff was replaced with a full alloy up-grade.
mtrearend019.webp

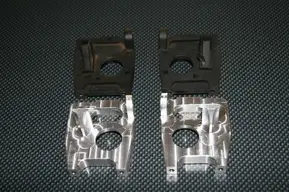
The plastic diff blocks that carry the diff have started to warp/bend and I suspect they are flexing, causing the lay shaft gear & diff gear to mesh poorly. Without hesitation these have been swapped over to alloy.
mtrearend003.webp

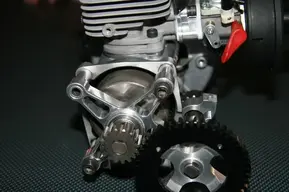
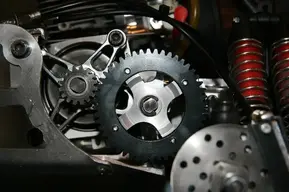
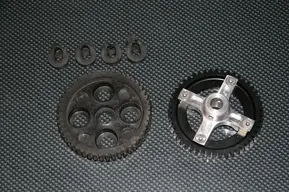
In regards to the spur gear and those 4 rubber cushions, I have ditched all that and replaced with the 48 tooth metal diff ring gear and an alloy gear mount.
mtrearend034.webp

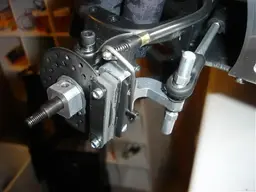
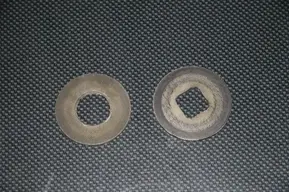
Brakes have always been an issue right from day one, below left is the original brake disc with the square drive completely rounded out & next to it is a disc with possibly 40 mins use and it’s already showing signs of wear in the square drive. I have replaced with 4 wheel disc brakes and this should increase stopping power and the service life.
mtrearend036.webp

Over the next few weeks I plan on adding a few extra goodies and will continue this thread providing the wife doesn’t kill me first.

For further info on DPS products email [email protected]

Let me know your thoughts and feel free to make any suggestions.
 
The ultimate upgrade to any FG offroader would have to be the Elcon drive train unit. This one upgrade solves many problems all at once. It makes the large engine mount obsolete, has alloy diff mounts built in and eliminates any chance of gears moving out of mesh due to flex. Also makes the engine quick to remove. Not sure if Kris has one there you can look at or not.
 
Bring on the bling! Necessary upgrades tho by the looks of it, mate she should be bulletproof.

Thanks mate, I hope so.

Michael I do like the Elcon up-grade but I have heard that a lot of there stuff is not compatable with the FG plastic or aluminium parts and I don't want to get locked in as it's expensive + not many locals support Elcon by stocking there parts.

Don't worry folks.... more cash to be spent, keep checking back:)
 
Looking good! My next purchase for the my FG monster truck will be the aluminum diff blocks as well - are your's the FG brand or other brand?


-Michael
 
Looking good! My next purchase for the my FG monster truck will be the aluminum diff blocks as well - are your's the FG brand or other brand?


-Michael

Hey wood, They are the Elcon 1 piece. You can get them in two piece but I think thats more to go wrong if you know what I mean.
Post some pic's when your done:)
 
The ultimate upgrade to any FG offroader would have to be the Elcon drive train unit. This one upgrade solves many problems all at once. It makes the large engine mount obsolete, has alloy diff mounts built in and eliminates any chance of gears moving out of mesh due to flex. Also makes the engine quick to remove. Not sure if Kris has one there you can look at or not.

In no way, shape, or form does the Elcon drive train make engine removal quicker.
 
Here we go, part 2... I bet some of you thought the wife had killed me but that is not the case.

Below is part #7474 it's the alloy gear plate holding the clutch bell / pinion & spur / layshaft. Sexy item imo.... well, I'm excited.
74741.webp

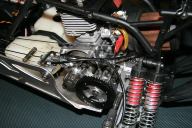
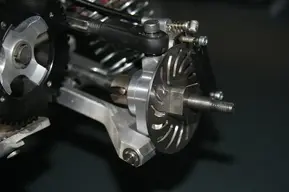
This next pic shows it installed, note: You can see the rear brake set-up.
74743.webp

And finally this is the truck approx. 99.6 % complete "ready to rock & roll".
74742.webp

Just need to put the wheels & pipe back on + use some kick a$$ loctite on the engine mounts possibly charge the Rx battery pack and away we go.
Did I mention use plenty of loctite on everthing.... well I know its a pain to undo but with all the alloy you will find the screws just fall out if you don't.

A special thanks goes to Kris at Danielspitstop for supplying all the bling, take some time to check out his website as it's constantly getting up-dated with more & more goodies everyday. Kris specialises in a few cars and should be able to assist you in your next up-grade.
stickers-D2.webp
 
Make sure to file those grubs on the gears and use red locktight - With it all alloy you will have no problems heating it for removal later.
Lookin good!:cool2:
 
allanach,

I love it man, looks sweet. What are is the part number(s) for the brake setup?


-Michael
 
Make sure to file those grubs on the gears and use red locktight - With it all alloy you will have no problems heating it for removal later.
Lookin good!:cool2:

Thanks BTB, I went to an engineering supplier and purchased high tensile grub screws that were too long and I cut them down with my die grinder. I finished the screws off on a bench grinder, also I noticed the hex is a bit deeper so you can get more allen key into it as well.
If you do this you have to be careful not to heat up the screw too much as it wil loose it's high tensile properties.
The loctite I use is the red stud lock, the guy at the engineering supplies warned me that this stuff can be really hard to remove..."perfect".

Hey Wood, The rear brakes are a L cheapo set off an XRC (Baja / FG rip off).
I can't take credit for working out that they fit the FG rear up-rights as I guy named Gumby showed me, but the install did require a fair bit of modification and I am happy to run you guys through with some pics let me know & I will do a how to!
 
Another recommendation. I know It's late and you already have the cables hooked up but it would be to your benefit to install tubing over the cables so that the casing does not rub through when against the chassis and shocks.
 

Attachments

  • DSC02660.webp
    DSC02660.webp
    19.5 KB · Views: 61
  • DSC03379.webp
    DSC03379.webp
    30.3 KB · Views: 64
BTB, I like that idea... I may do that.

Have you noticed that the car starts to get heavy when you slap all the goodies on, it's an obvious statement but I might have to weigh it just out of curiosity!!
 
BTB - Very clever idea!

allanach - my stock FG Monster Truck already weight's a ton so I bet yours with all the aluminum is much heavier.

BTW, where did you get that carbon counter top?


-Michael
 
BTW, where did you get that carbon counter top?-Michael

We built the house approx. 7 years ago and had to chose everthing that went in it, when the (lamanex) bench top people provided samples of bench tops it was a no brainer as I really liked that pattern.

Maybe tomorrow night I will add to this thread with some more goodies and I might even start a new one as I am running some hot off the cnc machined parts.

I am also working on a new project that no one has done on this forum before and it will blow you away, stay tuned.
 
The time has come to fit the rear vertical bearing carriers/ bearing blocks.
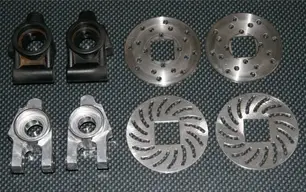
Pictured below is the old plastic ones and some average lookin discs + the new hardware.

Weballoybearingblocks1.webp

As you can see they will be replaced with alloy carriers and a set of disc rotors that cought my eye on www.danielspitstop.com.au

Here is a photo with them all fitted up.

Weballoybearingblocks2.webp

This alloy up-grading is addictive..... may have to go to rehab to stop:)
 
Back
Top