First proper breakage!

This site may earn a commission from merchant affiliate
links, including eBay, Amazon, and others.

fatboybuggernuts

Well-Known Member
Messages
209
Reaction score
2
Location
southend on sea essex
Took the KM buggy out yesterday on a nice big open wet grassy field all was going well till i jumped it of a mound and nose dived from about 7 or 8 feet and snapped the front skid plate in 2! other than that just a little wet and grassy lol. Thinking of possibly fabricating one myself out of steel as 1 i think it may last longer and 2 give a little weight to the front end as it seems to be very front end light and i want to see if added weight makes any difference! Has anybody else experienced this problem of a light front end on these buggies?

Here are the pics of the breakage!
 

Attachments

  • th_SH100597.webp
    th_SH100597.webp
    3.9 KB · Views: 20
  • th_SH100596.webp
    th_SH100596.webp
    4 KB · Views: 19
check you chassis is not bent at the front were it kicks up all bajas hpi and clones are renoun for it even with the smallest of impacts, i made a chassis brace for mine out of 3mm steel but most people use alloy i,ll post a piture of my brace in a bit for you.
 
Looks good pablo might do something a little bit similar to that. Have checked my chassis and it looks ok! I am quite impressed that the only break was the skid plate being that the impact was so harsh and it bounced and flipped about 9 times i didnt think it was gonna stop! I guess clones are not as badly built as some people think they are.
 
The main thing we all know but ignore, is that once you strengthen / re-inforce one part, you pass the load onto somewhere else.

If you strengthen everything, it'll end up at the gears, engine, mounts and shocks ...

I never go for hop-ups much (OK OK!!) ..... we all love hop-ups, but there is a price.

Al.
 
That is one concern i did have atom as i know that it could be an issue. That is why im trying to come up with some idea so that if a large impact happens it takes a lot of force out of the initial impact mybe some sort of rubber insert to allow movement and absorb the shock of the impact! Just an idea!
 
Just stripped the KM down to clean it and realised the damage was a little worse than first suspected! I'm pretty sure these shock tower supports are supposed to be in one piece not three lol. Lucky for me KM gave me two spares in the box with the other plastics spare bag. Phew!SH100604.webp
 
yah you have to leave a break point someplace for impacts, if you go ALL alloy on everything then it tranfers impact elswhere to a part harder to replace, i left my a arms plastic, theyre easy to get to and replace, front and rear bumpers plastic, great impact absorbing places, goin alloy here will definately xfer the breaks elsewhere. my towers are all alloy front and back, with alloy shock mounts upper as well. thing is, plan on truck where it would be easiest to get to, and fix, and maybe cheapest too, leave those places plastic, and the spots you want a lil more strength, then alloy up those.

so far on mine i haven't broken a thing, had a snag ona hostile boot from 2 speed cover tab ripping boot tip off of DS bones. but i fixed that with a new way to bolt my cover on removing that tab completely.

amyway, point is plan it out, beef up what can be beefed up, leave yourself break zones to absorb those impacts.
 
This is something i have been considering would like to have some alloy parts but i do know that breaking points need to be left in order to not do more damage than necasary! Have been a little stuck as to what parts to upgrade to alloy anyone have any suggestions or preferences of their own i should maybe consider?
 
i gave a couple ideas above, leave front and rear bumpers plastic, and a arms, should be able then to alloy up just bout everything else like towers, shock mounts chassis braces that are plastic swap for alloy, A arms will prolly be most broken, so definately leave plastic for a impact, bumpers are really good to leave plastic, they will absorb alot of impacts, its what i did on mine, and haven't bent nothing yet, or broken anything either.

you can give a lil more shoch resistance by adding those lower shock cup extenders, will allow you to add a lil more stiffness to shocks, and aid in clearance to bones and boots on that 2speed housing tab, like the one i removed and modded

038.webp

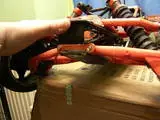
pic shows how i used the extra cone washer from 3 point clutch carrier, i had replaced the plastic one with a exact same metal version, the cone shape was machined in it so i didnt need the ones that were in the plastic one, the metal one also uses a larger TFE bearing too, a plus there, i had cut off the extension tube on backs of the cone washers and used them with a spare bolt and locknut to secure cover on , and removed the rear tab completely. so its just the 2 front top/bottom bolts holding it on, and its worked great.


also some hostile rear hubs
IMG_1327.webp

i changed the top link out for the metal strate versions mainly used with these hubs, just don't have pic of them on truck

front hubs changed to alloy

IMG_1324.webp

rear shock towers alloy

IMG_1330.webp
ifront tower

IMG_1323.webp
the 2 plastic parts on each side of X brace are now alloy as well, no pic of it


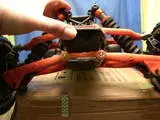
shot showin the alloy 3 point clutch carrier
036.webp

i have a enclosed carrier, but it wasnt machined right on the bearing housing, cant get bearings in it to line up, one side was off a lil and bell shaft will not go thru without a binding issue, also bell was scraping inside it, so decided to go with alloy 3 point instead.

IMG_1314.webp
192978278_tp1.webp


alloy split diff caseing installed, orange color
IMG_1329.webp

custom made light tab i made and mounted for KB light
IMG_1344.webp

woodster body i did up as gen lee

IMG_1355.webp
 
Back
Top