MCD Comp V4 Monster Truck-Assembly Thread

This site may earn a commission from merchant affiliate
links, including eBay, Amazon, and others.

macboss

Active Member
Messages
38
Location
Broken Arrow, Oklahoma, USA
I just joined the LSF and posted an intro in Introduction Thread.

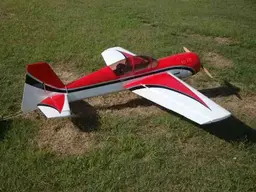
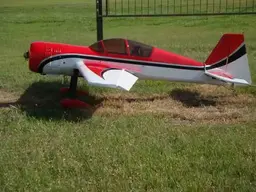
I became interested in RC cars a few months ago. My main hobby is RC planes; have several 50cc size gas planes and one 1/5th scale P-47 with a 5kw electric motor. The wind has been very bad this spring and a friend purchased a E-REVO and it really interested me. I just did not want to have to work with lipo batteries and did not want to go back to nitro engines. When I saw the 1/5th scale gas cars on the market, I knew that would be how I would go. I'm going to be more of hobby driver and hope to not have a lot of crashes.

I ordered the MCD V4 Monster from IHP and was very pleased with the service. I called them (did not write down the name) and was informed that they were out of stock of Zenoahs so I went with the CY 28.5cc in chrome. I figured it is really like this, I'll probably want to buy one of the custom engines later.

Basic kit:
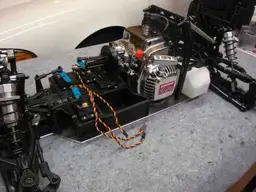
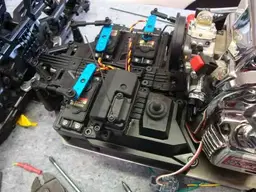
MCD Competition V4 Monster
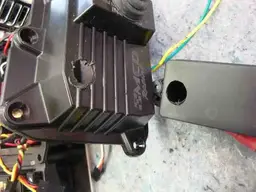
CY 28.5 Engine/chrome
Upgrading to IHP filter set/with outerwear
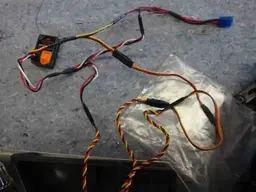
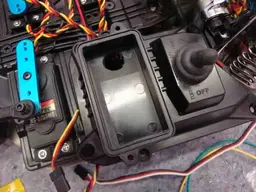
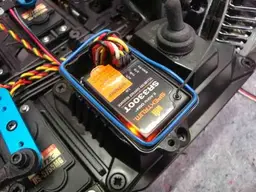
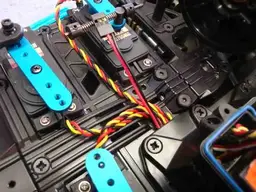
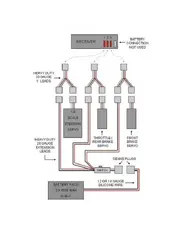
HS-5755MG Servos (using both throttle and steering)
DX3S radio: will us SR300T receiver for at least receiver battery voltage
Will have a 6v 4600 battery but may use A123 batteries ( I have several from my planes)

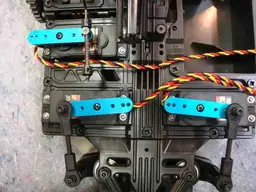
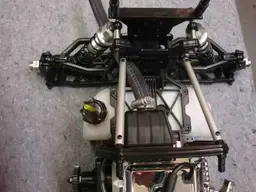
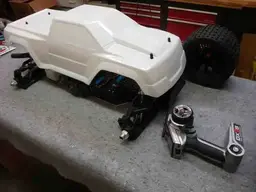
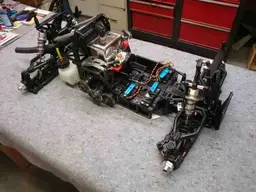
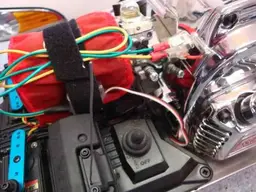
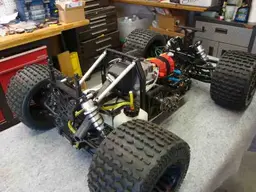
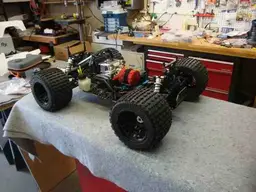
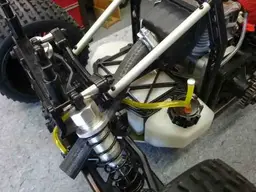
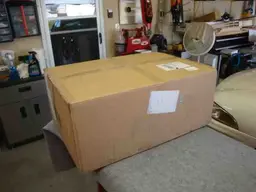
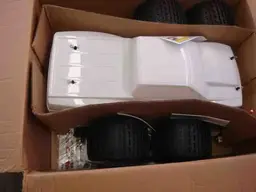
Just a couple of pictures;more tomorrow night, I hope. Pictures show a big box; everything was in good shape in box; chrome engine. No instructions but this thread has already helped me. Please fell free to send suggestions.
 

Attachments

  • big box.jpg
    big box.jpg
    17.9 KB · Views: 60
  • Box top open.jpg
    Box top open.jpg
    14.8 KB · Views: 73
  • chrome engine.jpg
    chrome engine.jpg
    25.6 KB · Views: 114
I'll post a few shots of the frame to show how the engine lays out tomorrow night. The engine is huge when compared to the engines used in aircraft.

Your up early,

Even old guys like me can see this truck. That is why I went to 50cc size planes. Big flys better and is easier to see. Hope same applies to cars. What I really like is gas engines are low cost on fuel and you just set on the ground and pull the cord.

Ed
 
Just a couple of comments on my build plans:

I'm going to use a spring loaded control horn on the brake: saw this in a post but can not remember where.

I used the big servos and will open them up and re-seal the bodies and shaft exit.

Will make my own wire bundle to have all servos draw power directly from the battery. Saw in a thread on this forum. Set this up with Y-harness and works great.

Put a new vent port in the gas cap: saw on this forum.

Will install a kill switch: either one from my plane inventory or I'll buy a Killer-B.

Will probably get a header and pipe later but using standard muffler now.

My hold up is waiting for delivery of the HiTec grease from Horizon Hobby-will be here on Tuesday.

I'm going to attempt to paint a nice color scheme. I may break out my air brush but rattle cans are OK too.

Good night for now.
 
+1 BtB - love big boxes full of bits!!
I'm not a fan of the 'new MCD MT tyres' as they just don't look like MT tyres - they have the dimensions and I'm told they're better made, more consistent, etc., .... but they're not MT tyres for me.

Definitely looks an interesting build.

Do you have an idea of the paint scheme yet?

Al.
 
High Macboss, on your servo's 5755mg why are you opening them up? they already come dust and water proof!!

Might be worth looking at the CPI Side pipe from Large Scale RC, very good power made from this pipe on the larger engines and fits the car perfectly unlike many so called yuned piipes that say they fit but burn your body and radio box!!!

Good upgrade is the MCD metal gear carrier, strengths things up, gets rid of heat better, smooths out the drive train.

MCD plastics are very tough. Good decision on the car.
 
BiggaJ-thanks for comments.

About the servos: There is a post in the electrics sections about problems with HiTec sealing rings on the servo bodies. Also, improving water resistance by putting a large bead of grease inside the servo cap around the output shaft. I probably will not be running in real wet areas but I'll have to think about this.
One servo issue that is bothersome is how the servo arms line up on the shafts. I attached a picture below showing the 3 servos with arms attached. One of my three servos has the arm almost perpendicular to the long axis of the case. The other two were off in almost the same direction by a few degrees. I used these 2 on the steering and as luck would have it, the are evenly off so I will have symmetrical alignment of the steering arms. I removed the cover of one of the steering servos to see if I could rotate the gears to get the arm to be straight but could not seem to make the arm change alignment. I did notice that there is no grease around the output shaft to keep water out: if that is needed.
I also attached pic of the standard muffler with a hose attached. I'll use this for a while. LS RC is out of stock on pipes so I'll get that later.
 

Attachments

  • servo arms.jpg
    servo arms.jpg
    28.8 KB · Views: 70
  • exhaust.jpg
    exhaust.jpg
    24.5 KB · Views: 62
Just a few more pictures of the body and chassis. You can see the size comparison to my controller. I also attached a picture of the wire harness I made up. The two steering servos are on a Y; the throttle servo is on a Y; I have a battery Y that goes to two JR male terminals. The steering Y is then connected to a second Y which is connected in parallel with the throttle Y to the battery and receiver. Note my battery will use the EC3 type connector ( I have a lot of these on planes).
Set up the servos, wheels, etc, and drove the truck around the yard today. Now that I know it all works, I start hard wiring everything in. Then on to body painting.
 

Attachments

  • with body.jpg
    with body.jpg
    19 KB · Views: 66
  • chasis.jpg
    chasis.jpg
    26.1 KB · Views: 85
  • side chasis.jpg
    side chasis.jpg
    24.6 KB · Views: 71
  • close wire set up.jpg
    close wire set up.jpg
    22 KB · Views: 61
Just a few more pictures of the body and chassis. You can see the size comparison to my controller. I also attached a picture of the wire harness I made up. The two steering servos are on a Y; the throttle servo is on a Y; I have a battery Y that goes to two JR male terminals. The steering Y is then connected to a second Y which is connected in parallel with the throttle Y to the battery and receiver. Note my battery will use the EC3 type connector ( I have a lot of these on planes).
Set up the servos, wheels, etc, and drove the truck around the yard today. Now that I know it all works, I start hard wiring everything in. Then on to body painting.

Lots of 'Y' leads used......my only question is Y?

Servo arms look normal to me.
 
There is a good disscussion about this in the ELECTRONICS section on the topic of Servo Wiring. Using a Y with battery and servo on the female connectors and the male connector going to the proper channel on the receiver prevents the receiver form seeing the high current draw if the servo should get stalled. This looks like a good idea with the steering servos on a monster truck. The HS5755 servo pulls almost 5 amps at stall.

On the large scale airplanes, a power box that separates the servos from the receivers is used for this: in some cases 3 or 4 servos can be grouped together to get very high torque so current draw can be high in normal loading.

I would like to rebuild the servo and Y leads but I am out of crimp-on connectors so I'll probably build using all this wire and then assemble a new wire system later.
 
PROBLEMS:

Well....I don't want to complain, but.......this truck sure could use a larger battery, receiver box. Very minimal space. Not enough room for my Y connectors, a small engine kill switch, the switch body, and then a 4600 mah battery.

I'm thinking about making a 1/2" spaceer out of wood to provide more volume. Even if I put the Y connectors outside the box, it is a tight fit.

If I could find a small receiver box from another type car, I may attach it to the top of this box to get more room.

Off to the local car shop to see if they have a suitable box.
 
Finished for now:

I finally gave up trying to stuff everything in the one box. I bought a Traxxax receiver box and mounted it to the top of the existing box. Drilled a 1/2" hole between them and glued the boxes together with RTV. Used three small bolts and nuts to hold them together.

I drilled a 1/16" hole in the top of the Traxxax box and let the antenna poke straight up. I'll dab a little sealer on this later.
 

Attachments

  • Traxxax box.jpg
    Traxxax box.jpg
    17.2 KB · Views: 51
  • hole in box.jpg
    hole in box.jpg
    21.5 KB · Views: 50
  • box mtg.jpg
    box mtg.jpg
    26.6 KB · Views: 53
  • box mtg with rcvr.jpg
    box mtg with rcvr.jpg
    28.3 KB · Views: 61
  • elect closed up.jpg
    elect closed up.jpg
    31 KB · Views: 62
A few more pictures: The three servo lead and the charge lead route nicely out the slot in the battery box. I used my dremal tool and opened the slot a little.

I used a aircraft engine shut off I had and am not sure where I'll mount it. I attached it to the spade connectors on the engine kill switch. Needed a soft place to mount it so I velcroed it to the air filter.
 

Attachments

  • servo leads with charge plug.jpg
    servo leads with charge plug.jpg
    30 KB · Views: 33
  • shut off on filter.jpg
    shut off on filter.jpg
    27.1 KB · Views: 39
A few shots of the assembly. I put two fuel lines on the tank cap: one for vent and one for filling. I'll use my aircraft gas system for filling.

Put a hose on the exhaust and will get a header later.

Now on to painting. I'm going to use red, gold, some white, and black.
 

Attachments

  • done back.jpg
    done back.jpg
    28 KB · Views: 72
  • all done front.jpg
    all done front.jpg
    26.6 KB · Views: 71
  • gas and exhaust.jpg
    gas and exhaust.jpg
    26.3 KB · Views: 66
Macboss,

You've obviously done some very nice and thorough work so far, and your experience from airplanes clearly translates. I think you'll have a lot of fun with the MCD platform and find it more than durable enough if you take care of it and drive sensibly.

Would you be able to post some clarification about your servo and battery wiring. I've seen this referred to several times on various forums, but I have a difficult time following it without a diagram. Would you have a link handy?

-Elk
 

Attachments

  • wire diagram.jpg
    wire diagram.jpg
    40.3 KB · Views: 34
Last edited:
Had one of the nicest days today. Did not work on the truck to go fly my new 85" wingspan Yak 54. Has a 55cc gas engine. Weather is supposed to get bad later this week so I'll start painting then.
 

Attachments

  • Yak 54.jpg
    Yak 54.jpg
    28.3 KB · Views: 11
  • yk 2.jpg
    yk 2.jpg
    26.9 KB · Views: 12
Back
Top
AdBlock Detected

We get it, advertisements are annoying!

Sure, ad-blocking software does a great job at blocking ads, but it also blocks useful features of our website. For the best site experience please disable your AdBlocker.

I've Disabled AdBlock    No Thanks