atom3624
Well-Known Member
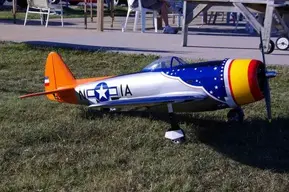
Very nice Ed.
Did you say you had a few aircraft or just the one?
Any Warbirds?
Al.
Did you say you had a few aircraft or just the one?
Any Warbirds?
Al.


Follow along with the video below to see how to install our site as a web app on your home screen.
Note: This feature may not be available in some browsers.
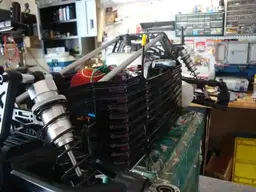
Finished for now:
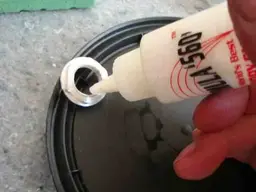
I finally gave up trying to stuff everything in the one box. I bought a Traxxax receiver box and mounted it to the top of the existing box. Drilled a 1/2" hole between them and glued the boxes together with RTV. Used three small bolts and nuts to hold them together.
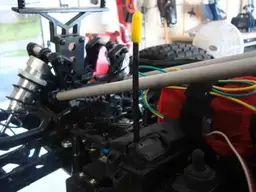
I drilled a 1/16" hole in the top of the Traxxax box and let the antenna poke straight up. I'll dab a little sealer on this later.
Register and gain access to Discussions, Reviews, Tech Tips, How to Articles, and much more - on the largest Large Scale RC community for RC enthusiasts that covers all aspects of the Large Scale RC!
Register Today It's free! This box will disappear once registered!