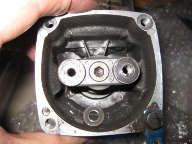
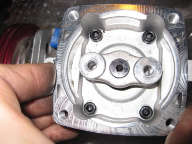
Firehammer MT - A few upgrades

This site may earn a commission from merchant affiliate
links, including eBay, Amazon, and others.

csp1971

Well-Known Member
Messages
1,664
Location
Missouri
Well, since I have the rear end apart now, I thought I would take a few pics and post them up.

As Slawhammer's Firehammer intern (kidding of course....or am I?), I have been given the go ahead to post a few things.

I will be installing/changing the following:

Rear hubs to alloy (RiverHobby Product)
Steering knuckles to alloy
Rear diff mounts to alloy (RiverHobby Product)
Gear plate to alloy (RiverHobby Product)
Radio tray to carbon fiber (looks like this will take a bit of modification)
stock 23cc to 26cc with Zenoah big bore kit (nothing special really)
Alloy intake manifold by Z-RC

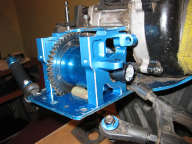
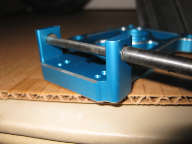
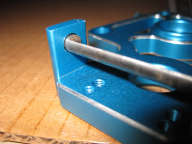
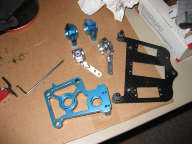
A few of the parts:
IMG_6356.jpg

I started to disassemble the back end tonight. Dirty little thing, isn't it? The Riverhobby parts seem to be pretty nice. They are anodized almost the same color as the FHMT original equipment. Pretty close anyway, when it gets dirty, who cares what color it is? I haven't screwed anything down yet, just getting a feel for the fit of the parts. Besides, I have the engine to do first, and that won't be happening tonight.

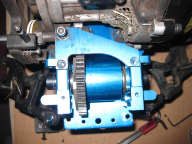
Anyone have any advice on how to pull off the Diff Bearings that seem to be welded onto the diff cage? I want to repack them with my handy dandy Fast Eddy bearing packer thing.
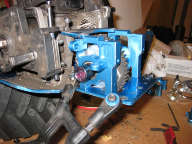
IMG_6355.jpg

IMG_6354.jpg

IMG_6353.jpg
 
Well,looks like you have your work cut out for you.

The only way to get the bearings off the diff cage would be to freeze the whole diff, overnite, by morning the bearings should come off easier. If they roll good, I wouldn't worry about it. I bought a sealed bearing kit for my FG, and I have used many of them already. Somthing for you to think about.
Keep the picture's coming.
 
Csp..you going to be stylin now my friend...that is a welcomed up grade...
you know I hate bearings in plastic any way....Keep up the good work .....
Yup get that new engine in there as well....want to see that firehammer fly....
......................Slawhammer.......................
 
Thanks Clubin. The bearings roll great, so I think might hold off on that part. Putting it in the freezer sounds like a great idea! I may try it.....

Anyway, Slaw shot me an e-mail last week and warned me that the Gear Plate may require some sort of bushing for the brake cam. Good news, won't need one, it fits perfectly, or at least close to perfect!


IMG_6358.jpg

IMG_6359.jpg
 
good news there for the cam break....some time you just luck out....
great ,,glad for you....Slawhammer
 
Last edited:
When I remove the bearings I slightly heat the part and then take a small screw driver that will fit the center of the bearing. The handle should just fit the hole of the part and hit the bearing. Then tap, or press them out. I have also heard about freezing but never had patience enough to try it.:blush: I would say the more you grease your bearings the better. If you run in any damp, wet conditions the bearings will freeze up if stored for long periods afterward. Obviously my Baja submerged itself but the diff bearings rusted tight overnight. I removed, cleaned with WD40 in a cup, and repacked them and they are now good as new.:)
Nice looking parts you have going there.:cool2:
 
csp, where did you buy the River Hobby parts? And the steering knuckles?

The riverhobby parts are from New Zealand:

http://rcinnovations.co.nz/shop/catalog/index.php?cPath=37_44

Over on the right side of the screen on their site is a USD conversion dropdown so you can get USD prices. It only took about 10 days to get the parts. The shipping was only around 10-12 bucks I think. Really good place to deal with. Powerslide runs about the same amount (http://powerslideracing.com.au/index.php?main_page=index&cPath=57_3).

As for the steering knuckles, I bought those second-hand from Slawhammer. These are sold at Tower Hobbies though. The rear hubs can also be purchased from Tower Hobbies.(http://www3.towerhobbies.com/cgi-bin/wti0001p?&I=LXHUA9&P=7) (http://www3.towerhobbies.com/cgi-bin/wti0001p?&I=LXHUB0&P=7)
 
Now you got some good support for the rear end...all be much better when you get
it all back together...little more solid for the drivetrain....Slawhammer
 
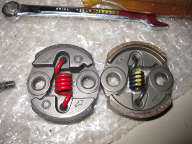
The flywheel came today. I noticed that the clutch that comes with the Firehammer MT is different than the clutch that came with the new clutch case kit. It won't attach to the clutch plate without hitting the sides of it.

First pic, clutch on left (FHMT original), clutch on right (CY):

IMG_6563.jpg

See how the FHMT one is raised while the CY is flat for mounting?

That is the original FHMT clutch i've had in there for almost 2 years now. Maybe the shoe material is made of some sort of excellent, high-grade material.

The next pics show the FHMT clutch plate and the CY clutch plate, you can see the obvious differences and the reason why the FHMT clutch won't fit the CY clutch plate. Perhaps Zenoah is different...I don't know. Someone tell me! Anyway, I'm annoyed with the whole damn FHMT engine to be honest. The only useful parts....as far as I know are the carb, plug, and....well really that is it. The flywheel won't even come off. The holes are not drilled out for a flywheel puller. The clutch housing won't unbolt, it's all one piece.

IMG_6564.jpg

IMG_6565.jpg
 
Last edited:
Csp..On the clutch case..you may have to grind off those alloy tabs..On the outside
of the case.....The narrow one with the hole drilled in it may interfear with the carb or brake linkage.....The more square one may hit the bottom of chassie when mounting the engine.....You don't need those tabs....,,,,Just trying to save you problems....
Now as too your orig engine...scrap bucket is the best place for that.........
I would not even be sure about the old carb at this point....wt688 would be better....
The CT clutch system is way better........
This is how we learn....from sharing with others....
Best to you on your build.....Slawhammer
 
Okay, just an update on my engine. The wannabe CY/Zenoah that comes with the Firehammer MT has the following parts that will work with other engines:

1) Carb
2) spark plug
3) air filter
4) pull start

The bad:
I found that the clone fan cover doesn't fit properly on a CY...almost a 1/4 inch gap on one side.
The flywheel will not come off unless you tap the holes, and even then it's anyone's guess if it will fit on a CY/Zenoah.
The clutch won't fit on a CY/Zenoah.

So basically, the engine is a throwaway except for a couple of parts. Hopefully I can begin putting the truck back together this weekend and get that 29cc running!
 
Well at least you could safe some thing....to bad they make stuff you cannot repair..
must be throw away item....Best to you on getting the rebuild ready to go.....
Hope to hear a report on the performance......Slawhammer
 
I would LOVE to be making this next part up, I would really love to......

Go ahead and guess which other part is not compatible with a CY/Zen engine.....please, guess.
 
Okay, you all have lives. I have one, but 2 little ones are sucking it out of me......


Anyway, I found that the Duratrax pull start does NOT fit onto the CY fan cover. Yes, I'm serious. I'm sure you are asking yourself, "Why would csp toy with me like this?" I'm not, it really does not fit. Shouldn't really be a surprise since the :censored:ing fan cover didn't work.

So it's off, slightly. But thankfully I had a spare pull start. The same one I fixed a few posts back thanks to BTB's tutorial on tightening the rope. A couple days ago, about an hour after fixing it, I pulled the pull start and it snapped where the spring grips onto the white piece. So much for that spare....OR SO I THOUGHT.....I went ahead and grabbed the broken one and decided to see if I could switch the guts out of the Duratrax to the CY pull start. Naturally, they were different but looked as if they might work. While I had it all apart, I put in a new Craftwerks pullstart rope and a new ada billet pull handle (the cheap $2 one). Used BTB's tutorial again to tighten it up and....Voila!!!.....a new pull starter that appears to work. So, the evening wasn't a total loss. I learned more about pull starters and I think I'll order a full spare pull starter on my next order along with another Craftwerks pull start rope. :)
 
I have the bearings from the clutch bell running through the bearings in the new gear plate. The bearings have very slight play (clutch bell moves up and down side to side). Is there some way to get rid of this slop? Can something be used to keep the bearings in place better?

Would teflon tape work wrapped around the outside of the bearing?
 
Hey my friend..I use red lock tite..on the outer race of the bearing..let set up over night
That will do the trick....You can still get the bearing out when time to do so....
I do that to all my bearings.....It will hold them in place and the outer case will not spin on you.....I have done this on 1/1 car's and trucks as well.....Slawhammer
 
Last edited:
Hey my friend..I use red lock tite..on the outer race of the bearing..let set up over night
That will do the trick....You can still get the bearing out when time to do so....
I do that to all my bearings.....It will hold them in place and the outer case will not sinp on you.....I have done this on 1/1 car's and trucks as well.....Slawhammer

Just as said use locktight.:)
I have also used ZAPII sealant to secure mine in both alloy and plastic.
 
Back
Top
AdBlock Detected

We get it, advertisements are annoying!

Sure, ad-blocking software does a great job at blocking ads, but it also blocks useful features of our website. For the best site experience please disable your AdBlocker.

I've Disabled AdBlock    No Thanks