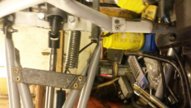
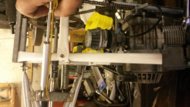
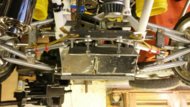
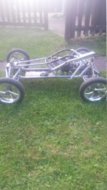
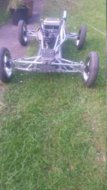
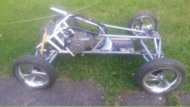
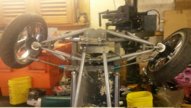
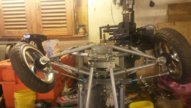
My large not so scale project

This site may earn a commission from merchant affiliate
links, including eBay, Amazon, and others.
Never thought of a go-cart, I'll look into that. Yeah I like the wheels I'm using too and they were really easy to modify but I'm not sure just how strong they are, OK they can withstand the weight of a laden pushchair with shopping and baby but how will they fare on a buggy that weighs maybe 10kg once built at 50mph? The tires aren't much to talk about either, just a kind of rubberised foam. They'll have almost zero traction in wet grass and the tires wouldn't last long on tarmac. I don't know, maybe if I could find a way to put pneumatic tires on the rims then they'd fare better I think.

Lawnmower wheels might work so long as they came off of a decent make, they'd have to be fitted with solid tires at least. I've really narrowed my choice in the wheel department because I've changed the drive shaft size.

How big are Baja wheels? I think they'd be too small though but it's the biggest purpose made wheel I can think of lol.
 
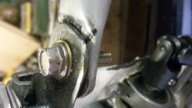
I managed to do a small amount today, the idea of using theseimperial-roundshaft-starlock.jpg together with solid bar running through brass tube to replace the bolts on the swing arm pivots proved a washout. I thought once they were locked that was it but they eventually loosen. I may use them somewhere else but I'm going to buy some m5 bolts to go through the brass tube instead.

On the positive side I have made the cross members what the engine will mount to, I've decided to give the rubber mounts a try. I have an idea of cutting some pipe to size, cut it in half lengthwise and tie wrapping the pipe around the rubber to stiffen them up which I think will work. It'll be a milestone to get the engine mounted and I can't wait but tomorrow I'm helping a friend drop a replacement engine into his car so it'll be Wednesday when I do that. Once my engine is mounted then I can plot where everything else will go. Fuel tank obviously has to go above the engine but all the electronics should have plenty of room in front of the engine. Because all electrical power will come from a 7ah lead acid battery I think it prudent to fashion a battery box which I'll make out of aluminium plate together with an electronics box. I'm thinking of a way to give the boxes a degree of protection from water with some kind of rubber gasket made from old inner tubes. So that's all for now and more to come :)
 
Last edited:
Don't you just love it when something simply fits? 20150805_181944.jpg I was scratching my head as to where I was going to put the brake, low and behold the pillow block mounting holes are exactly the same distance from each other as are the opposing mounting holes on the disc :). I really have to make the cover for the diff before it gets tested or I'm afraid the brake might rip the diff apart.

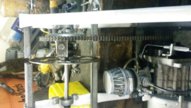
Engines mounted YAY! 20150805_182008.jpg

20150805_182015.jpg

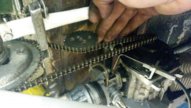
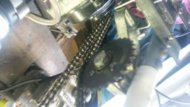
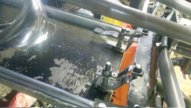
This is where the spring loaded chain tensioner will go20150805_183950.jpg

Now the eagle eyed will notice I have cut the cross members in half 20150805_183440.jpg I did that because I made a slight error as to where the cross members were going lol. I'll be attaching bracing to connect them up again.

The plan to wrap pipe around the rubber mounts didn't pan out so I'll brace the engine via the roll cage. After I install the tensioner I'll be focusing on the roll cage and making the rear end solid. More to come
 
Last edited:
Today was not a good day for building buggies apparently, but I didn't decide that, my buggy did lol. Mr Postman brought me some bits including the steel for finishing off the shafts so I was happy at the time. What changed that was a number of things. First I soon found out the m3 tap that I waited 2 weeks for was actually left handed, second the steel for the shafts was too big for the universal joint bores so that had to be grinded down to fit. That proved to be a waste of time because when it came to drill holes for the grub screws, I snapped my last two 2.5mm bits plus they wouldn't even touch the steel. Even the 3mm carbide bit I have couldn't make a mark. By this time I was so angry I could've howled at the moon if it were out to howl at lol. Waste of time, waste of metal, waste of drill bits and waste of money, that's how I saw it. Oh well, I'll have to get some more bar stock because I'm not about to waste any more bits trying to drill through the stainless again.

The day wasn't a total washout though, I made and mounted the chain tensioner 20150806_161523.jpg I'll fit the spring when the roll cage is done. More to come..... Hopefully lol ;)
 
It might seem to some that what I post isn't really much and if I'm honest I tend to agree. It's as if I'm chronicling my build frame by frame lol. The reason why is because whatever task I'm on with I sit and look at it to determine the best course of action. Sometimes I have to redo something or try a different way to tackle something and it takes time plus I only dedicate maybe 6 hours in a day building. I felt that I needed to explain because I don't want any readers getting bored lol.

That being said I've done some more today. I've braced the rear most cross member and started on the roll cage 20150807_182758.jpg and I've replaced all the bolts holding the swing arms and wish bones with brass tubing, brass washers and m5 bolts 20150807_182821.jpg the end result makes for a secure and smooth movement. The roll cage won't be as high as in the first picture but maybe one or two inches lower.

I received the exhaust through the post but I will have to modify it to fit it the expansion chamber will hang too low. I can't weld plus the exhaust is stainless in any case so I'll be using joints made from pipe and u clamps plus maybe some gun gum. More to come..
 
Super you really need to learn how to weld as all your efforts to rivet bits

will turn out to be a waste of time when the vibration will loosen them, not that

i am an expert welder or even a decent builder of large scale models LOL

also have you tried photobucket for your pictures as it is so monotonous :sleep:

having to open every step of your build.......;)

K....
 
I take it you don't like rivets lol. They're just hold it together until it's built then I'll get a friend to weld the important parts, things that aren't as important I'll keep riveted. I understand the rivets won't last long but if put in the right place they hold really well. I have actually uploaded the pictures to photo bucket yesterday evening so if you would like to have a look then here's the link

http://s899.photobucket.com/user/superchip69/library/?view=recent&page=1
 
Last edited:
Made the diff shroud today, it's in two parts and made of aluminium plate. Plus it's ugly as sin so I decided not to take a photo of that lol. Apart from providing some protection for the gears it also gives the diff cage much needed stiffness. And yes I used rivets on this as well lol.
 
Made a little more progress today, I finally have a complete rear axle! After a lot of frustration with ordering the wrong kind of metal and the resulting broken drill bits, I'm kinda glad I've got this part of the build done :) sorry I don't have a picture as my phone died on me but I'll post some soon. Now I can busy myself fitting the rear springs, mount the brake calliper and continue with the roll cage but that's still to come lol.
 
There wasn't much to take a picture of today so I didn't bother lol. I made a start on making mounts for the rear gas struts and I also started to make limiter straps because I'm not going to use the full travel of the struts. Yesterday I cut up the exhaust so i could route the expansion chamber in such a way that it won't drag on the floor, I cut some of the floor pan away to accommodate the chambers new position. I have a question regarding the exhaust, there's a 4 or 5 inch straight portion of exhaust that's not really needed, can I cut this off without affecting the way the exhaust works?
 
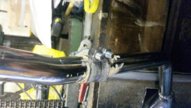
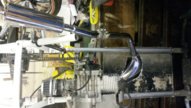
Got the exhaust routed, used exhaust assembly paste to join it up and fabricated 3 clamps to hold it all together

20150813_190328.jpg

20150813_190317.jpg

20150813_190306.jpg

I had to cut some of the floor pan out for the expansion chamber, I'll make it neater when I get time. I couldn't find any U clamps small enough, the smallest I could find is 28mm and the pipe is 24mm. I suppose they would've worked but I wanted to make them anyway lol. The result is a really solid exhaust, I haven't made a bracket to bolt it to the roll cage yet but I will.

Got the rear springs sorted 20150813_190404.jpg I haven't fitted them permanently, just trying out the tension.

This is how I'm going to place the gas struts 20150813_190422.jpg yes I've used more rivets :p. The yellow material running along side the strut is the limiter strap. I'm going to make the strap shorter than this I just wanted to test the materials strength. More to come :D.
 
Mounted the rear shocks 20150815_192642.jpg and they work very well together with the trampoline springs. I'm going to make a spoiler to hide some of the shock mount once I have built up the roll cage a bit more. It doesn’t look like much from this angle but when viewed from the side it looks rather good.

I'll be concentrating more on the roll cage now and maybe I'll make the spoiler too. More to come
 
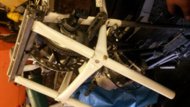
I now have a rolling chassis!

20150817_185555.jpg

20150817_185609.jpg

20150817_185624.jpg

I'm starting to have doubts about the wheels now I've seen it sitting on them. the front track is slightly wider than the back but that's no problem. I think I'll have to tension the front springs more as the suspension is a little soft and I've still got maybe one and a half pounds of motors, electronics and lead acid battery to install lol.
 
Last edited:
Been sorting out some steering linkage today. It all has to made from scratch so progress is slow, regardless I have made up the tie rods and about 80% of the linkage so it should be finished tomorrow. With what small tests I could do in it's current state I believe I have achieved some Ackerman angle at both locks, whether it's going to be enough remains to be seen. I also plan to make some bump stops for the turn buckles so as to prevent any steering overthrow.

I've been thinking of bumpers too. what I was thinking is to make them spring loaded to help prevent,or at least minimise, the chassis from getting bent. They also have to provide some protection to the wish bones but not too long so that the car looks like a dodgem lol. It only needs one at the front really because on the maiden drive it will only be able to go forwards, I'll attempt the reverse after it is ruuning good. More to come.
 
Linkage done, just need to secure at the top to prevent the linkage from bending the floor pan 20150819_183653.jpg

managed to get some Ackerman angle 20150819_183637.jpg
20150819_183703.jpg

Tomorrow I'm hoping to fit the steering servo and sort some kind of servo saver between the servo horn and linkage. More to come.
 
Received some bits today, fuel tank, 10mm pillow block to support the longer rear drive shaft mid way and some fuel pipe. Well I wanted to start the engine to cure the exhaust paste and what happens? The so-called ez start cord to start the engine goes floppy after the third pull! Looks like the return spring has had it so I'm going to remove the pull start and use a drill to start it from now on because those pull starts are a total waste of time. Only had a couple of hours on it today, hopefully I'll have more time on it tomorrow.
 
Back
Top
AdBlock Detected

We get it, advertisements are annoying!

Sure, ad-blocking software does a great job at blocking ads, but it also blocks useful features of our website. For the best site experience please disable your AdBlocker.

I've Disabled AdBlock    No Thanks