My Monster rebuild

This site may earn a commission from merchant affiliate
links, including eBay, Amazon, and others.
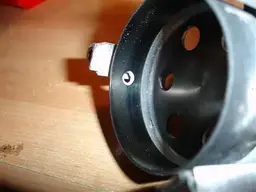
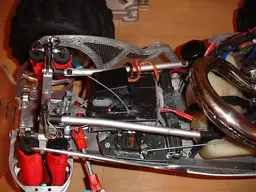
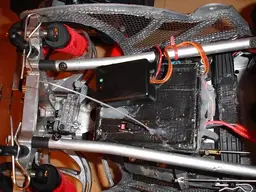
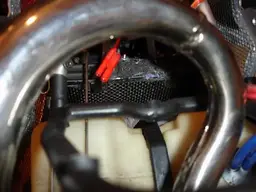
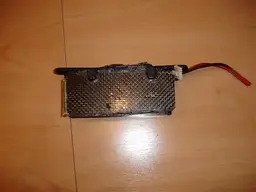
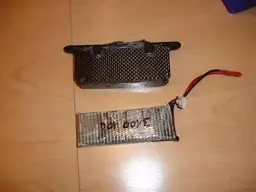
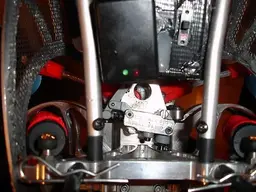
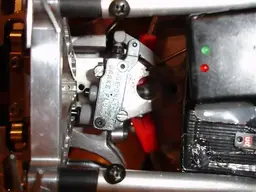
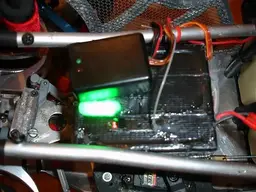
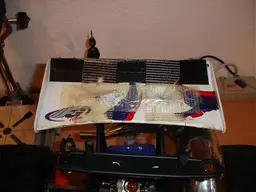
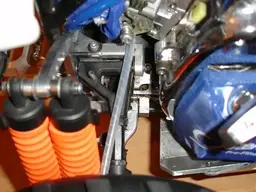
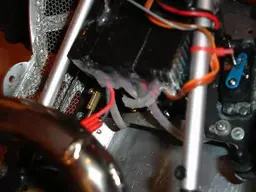
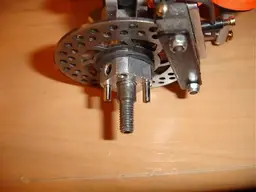
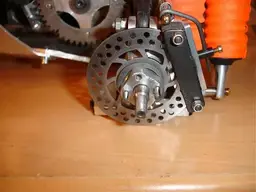
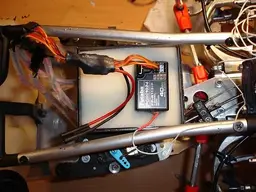
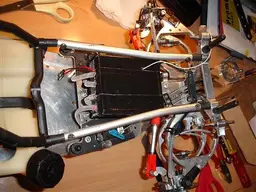
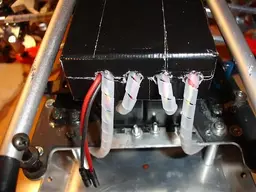
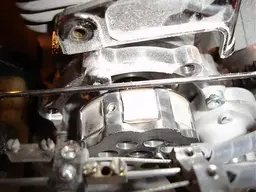
some changes for the receiver box, two weeks ago a changed to 2.4 and a new Lipo regulator...MaxBec from Jeti.

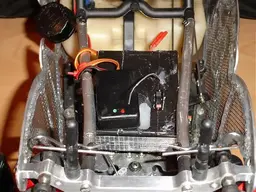
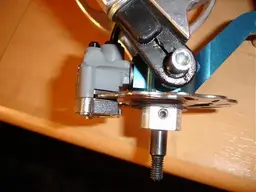
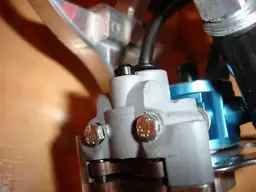
(Yes I have a real failsave with 3rd channel motor off, pics will follow)
 

Attachments

  • DSC04084.webp
    DSC04084.webp
    35.9 KB · Views: 23
  • 25151202234308.webp
    25151202234308.webp
    36.9 KB · Views: 23
  • 25151202234347.webp
    25151202234347.webp
    42 KB · Views: 22
  • 25151202234372.webp
    25151202234372.webp
    30 KB · Views: 29
Last edited:
little mod, keeps the stones out...basicly...ok, not really but...better then nothing...
did I mention that I got "trousers" for the winter for my Truck?:cool2:
 

Attachments

  • 25151202159638.webp
    25151202159638.webp
    25.7 KB · Views: 22
  • 25151202159857.webp
    25151202159857.webp
    43.2 KB · Views: 32
ok guys, the rest of the building an d pics I got at work, tomorrow evening new pics will follow...

in the meantime lets have a look and lets discuss about my Elcon clutch problems...the end of the story is, now, I drive a harm 2 shoes clutch...

The white material is teflon from the clutch...I YES I KNOW how to istall and manage a 4 shoes clutch...I thought...:clown:
 

Attachments

  • DSC04085.webp
    DSC04085.webp
    21 KB · Views: 18
  • DSC04086.webp
    DSC04086.webp
    32.7 KB · Views: 22
  • DSC04088.webp
    DSC04088.webp
    32.4 KB · Views: 23
  • DSC04091.webp
    DSC04091.webp
    11.3 KB · Views: 19
  • DSC04095.webp
    DSC04095.webp
    28.2 KB · Views: 25
Last pics for today. Final building stage and my FG Monster Beetle Pro for 2009 I will show you tomorrow, after work.

- Tomorrow I will show you my little mods an the body ( 4 years old and still in a very good condition).

- Cheap ( 150$) hydros on the front axle
- Cheap frontrammer
- and some other pics

good night and lets think big :-)
 

Attachments

  • DSC04093.webp
    DSC04093.webp
    22.6 KB · Views: 17
  • DSC04094.webp
    DSC04094.webp
    17.4 KB · Views: 14
  • DSC04096.webp
    DSC04096.webp
    22.3 KB · Views: 17
ok, lets continue...

the black blox is my 3rd channel failsave. It kills the motor by signal los, battery failure, or by switch.

The other "box" is for my lipo. Protection against heat, shocks and other things.
 

Attachments

  • DSC05408.webp
    DSC05408.webp
    43.2 KB · Views: 18
  • DSC05412.webp
    DSC05412.webp
    53.7 KB · Views: 16
  • DSC05413.webp
    DSC05413.webp
    21.6 KB · Views: 16
  • DSC05414.webp
    DSC05414.webp
    17.2 KB · Views: 13
  • DSC05415.webp
    DSC05415.webp
    21.5 KB · Views: 14
the back and my front hydros. details on the hydros will follow. I bought them cheap from a german manufacturer. Harm.
 

Attachments

  • DSC05417.webp
    DSC05417.webp
    38.2 KB · Views: 34
  • DSC05423.webp
    DSC05423.webp
    29.4 KB · Views: 14
  • DSC05425.webp
    DSC05425.webp
    29.6 KB · Views: 14
  • DSC05427.webp
    DSC05427.webp
    16.3 KB · Views: 13
  • DSC05428.webp
    DSC05428.webp
    45.2 KB · Views: 16
Last edited:
hydro, front and sideview
 

Attachments

  • DSC05429.webp
    DSC05429.webp
    30.4 KB · Views: 13
  • DSC05431.webp
    DSC05431.webp
    31.8 KB · Views: 9
  • DSC05432.webp
    DSC05432.webp
    25.9 KB · Views: 13
  • DSC05433.webp
    DSC05433.webp
    36.4 KB · Views: 11
  • DSC05435.webp
    DSC05435.webp
    34.2 KB · Views: 9
lipo regulator from Jeti. 4 leds indicating the status of my lipo bat. And my body, already 4 years old! I reinforced the entire body with straping tape.
 

Attachments

  • DSC05437.webp
    DSC05437.webp
    25.1 KB · Views: 7
  • DSC05438.webp
    DSC05438.webp
    29.4 KB · Views: 13
  • DSC05439.webp
    DSC05439.webp
    17.6 KB · Views: 9
  • DSC05440.webp
    DSC05440.webp
    21.7 KB · Views: 6
  • DSC05441.webp
    DSC05441.webp
    38 KB · Views: 7
my repaired front bumper, and a sideview
 

Attachments

  • DSC05442.webp
    DSC05442.webp
    19 KB · Views: 18
  • DSC05444.webp
    DSC05444.webp
    25.8 KB · Views: 15
  • DSC05445.webp
    DSC05445.webp
    27.1 KB · Views: 24
  • DSC05447.webp
    DSC05447.webp
    24.7 KB · Views: 22
  • DSC05449.webp
    DSC05449.webp
    43.5 KB · Views: 37
last pics for today. More details this evening.

Have fun! Greets to all of you!
Sven
 

Attachments

  • DSC05450.webp
    DSC05450.webp
    28 KB · Views: 18
  • DSC05451.webp
    DSC05451.webp
    23.7 KB · Views: 15
  • DSC05458.webp
    DSC05458.webp
    30.4 KB · Views: 13
  • DSC05459.webp
    DSC05459.webp
    24.2 KB · Views: 19
Damn....nice work :clap: Great pictures too :) I`m waiting with excitement for a picture showing the complete car.
 
the last ones for this year:cool2:

I trilled three little holes into my tires. There is no foam inside too. With the holes, the car isnt doing after a jump the "bunny thing..." jump jump jump...
 

Attachments

  • DSC05461.webp
    DSC05461.webp
    19.7 KB · Views: 21
  • DSC05463.webp
    DSC05463.webp
    24.7 KB · Views: 17
  • DSC05470.webp
    DSC05470.webp
    11 KB · Views: 19
  • DSC05491.webp
    DSC05491.webp
    41.3 KB · Views: 26
Last edited:
Because of a damaged ball bearing, I almost lost my rims because of extreme heat. I installed one of those like in the last pics.
 

Attachments

  • DSC05477.webp
    DSC05477.webp
    16.9 KB · Views: 21
  • DSC05478.webp
    DSC05478.webp
    29.6 KB · Views: 26
  • DSC05480.webp
    DSC05480.webp
    21.4 KB · Views: 21
  • DSC05481.webp
    DSC05481.webp
    32 KB · Views: 24
some closeup of the cheap Harm Hydro. (Sorry for the chocolate in the pic)
 

Attachments

  • DSC05482.webp
    DSC05482.webp
    28.3 KB · Views: 30
  • DSC05484.webp
    DSC05484.webp
    21.2 KB · Views: 22
  • DSC05485.webp
    DSC05485.webp
    18.4 KB · Views: 23
  • DSC05488.webp
    DSC05488.webp
    17.1 KB · Views: 17
  • DSC05489.webp
    DSC05489.webp
    24.6 KB · Views: 30
the last one for today, just the things I need around me to survive :cool2:

Happy New year to all of you!!! See you tomorrow!
Greets from Switzerland
 

Attachments

  • DSC05465.webp
    DSC05465.webp
    46.6 KB · Views: 38
Nice one

thats a nice toy you have your self there i am going to upgrade to some alloy parts soon lol HOW MUCH!!!!

HAPPY NEW YEAR EVRYONE AT LARGESCALEFORUMS.COM :cup-3::rockon::rockon::rockon::rockon::rockon::rockon::rockon:


VAMPY!!!
 
it´s maybe a ølitle late to tell you this now.
but i´ll do it anyway.
i niticed that you hav emonted the rear lower wishbone mounts upside down and on the wrong side.
if you look at them you will see that they are higer in oen end than int he other.
the highets side is supposed to be nearest to the engine.
when mounted right the lower wishbone will be tilted up in the front.
this will give you an Antisquat angel that gives you more on power steering.
 
Back
Top