traxxas 1/16 e-revo vxl with 2.4 ghz radio

This site may earn a commission from merchant affiliate
links, including eBay, Amazon, and others.
no the invert is for laptops, the car is 12v dc, but laptops run on 240v ac, the inverter converts the power from dc to ac and bumps up the voltage, you can run low wattage house hold appliances from it in the car.

its hard to drive down the high way doing 100kmh with the bonnet up with the charger sitting un the rocker cover directly connected to the car battery charging some camera batteries.

the aligator clips are for when the car is parked up, the cigarette lighter adaptor is for while driving, or if you want your car locked up while charging at low amps the falcon dash will handle 10 amps and is fused for 15 amps, but i wouldnt charge aa nimh batteries at that high witch is what i made that lead for.

my old charge that was sold with my micro dt i made up cigarette lighter adaptor to do the same thing and we actualy used it lots, its very handy to me and i use it form 1/2 amp to 4 amps from inside the car, i don't recomend people to charge lipos inside the car, but other batteries no worries.
 
To me it does lol but for any one else reading the thread mabe not as I'm hard to follow some times and jump all over the place
 
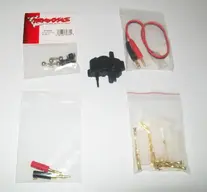
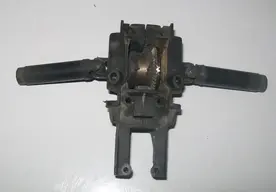
heres no local hobby shop near but i like getting stuff in the mail, so i was stoked when i got home from work and there was 5 envolopes waiting for me, i got another set of pivot balls and pivot ball clip,s as last time i was out of action for 2 weeks because of 1 plastic pivot ball clip and lack of comunication from a parts seller, a complete new gear box i won cleap off ebay, a female tamiya to 4mm banana charge lead i have to modify, pluss 5 x pairs of tamiya plugs and 2 x 4mm banana plugs

100_3873.webp

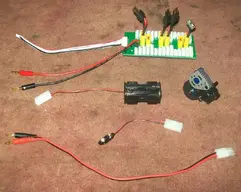
i cut the male xt60 connector off the hobby king parrallel charging board and installed the 4mm banana plugs so i don't have to use adaptors or a charge lead to connect it to my charger i can plug it straight in.

i cut the futaba plug of my 4 aa battery holder (old rx pack) cause i had to use a couple of diffrent adaptors to be able to charge it, but now with the female tamiya plug on it i can use it more direct and plug it straight into the a female tamiya to 4mm banana charge lead that i cut the end off and installed a male tamiya plug instead to suit my other charge leads.

i have a 9v plug to futaba female lead for charging 9v batteries and it also connects to my 8 aa batery holder for charging (i made that a few years back), but to use it i had a use a couple of diffrent adaptors to be able to charge it, but now with the female tamiya plug on i can use it more direct and plug it straight into the tamiya charge lead i modded and i also assembled the merv gear box with some other gear box parts and spur set i got cheap off ebay.

100_3874.webp

i like tamiya connectors for low current charging, quick easy and cheap, but i don't like how they are just crimp so i solder them as well jsut to be on the safe side.
 
i was kind of spewing my other spare stock Tyre's didn't turn up Friday, so today i took my wife and daughter out to lunch in the city approx 150km round trip, i just happened to drive past a open hobby shop who sells thine ca glue lolls.

when i got home i glued up the new tyres that turned up that only lasted 4 x 2s lipos and popped off the rims when i chucked in a 3s lipo, they didn't look pretty after i glued them but i don't think they will come off again.

i think the dirt is getting into the rim via the rims two breathing holes, so before i glued up the rims i ran a couple of rings of electrical tap around the inside of the rim to cover the breathing holes, then glued the rims on.

the other two rims i had the tread was about 60% one was full of dirt, but i was able to peal onside away from the rim, it was hard work and took ages, but i got about 6 table spoons of grey dirt out of it, but the foam around the breather holes was still full of dirt, so after a bit of stuffing around i was able to get most out and i re glued it.

the other rim/tyre wasn't to bad so i just checked the tyre over and dropped a couple of drops of ca glue on the tyres edge around the rim i did the same to all other tyres once they other had dried, even though they all looked pretty good.

we ended up taking the Merv down to the local swim hole but there was heaps of campers there, i didn't want to cover them in dust, so when went over the back to run it, but in my finger gluing frenzy i for got to replace the rear right broken suspension arm from a sharp rock i hit last time i was there, i thought well stuff it ill run it still.

i ended up running 3 zippy 2200mah lipos approx 60 Min's run time, to prove to myself its my don't nut addiction and tyre ballooning thats sucking in the dirt though the two large breather holes on the rims i did a ship load of donuts, stopping every now and then to check the rears with untaped breather holes, sure enough the inside of the rims where caked with dirt and dust and after a couple of batteries i could feel grit inside the tyres again, but none in the fronts with tapped foams.

i also noticed the fronts where not ballooning as much with blocked breather holes, this could be cause the tyres are new but i still think the blocked breather holes helped with ballooning.

here is a quick video uploaded from my iphone 4 there is no sound sorry wife must of covered the Mic.


here is a quick video of my 3 year old daughter driving it.


here is a couple of pictures for my mate Sohan'

100_3875.webp

100_3877.webp

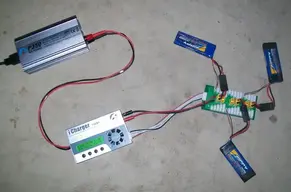
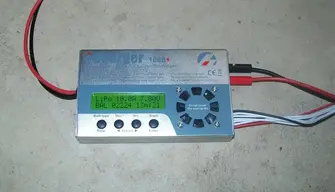
i was able to balance charge 3 x 2s 2200mah zippies after coming off low voltage cuff of from the Merv to fully balanced charged in 46 Min's at approx 1.5c (10 amps) and they took over 6600 mah combined still.
 
Last edited by a moderator:
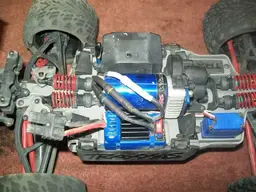
today i thought ill better put some more heat shrink on the motor/esc wires as you could see the gold connectors from crash landing on the roof, i don't want them to short out.


you know i like pictures so here is a pic of the job 2/3 done.


100_3883.webp


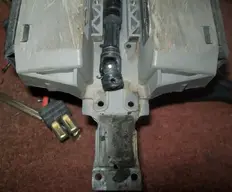
its hard to see because of the flash but there was gold from the motor connector showing, while i was there i replace the broken rear right lower suspension arm, that was broken from 2 bashes ago and i pulled off the center skid plat to have a look at the center drive shaft to see if its as worn as the rears.


the center shaft was all good and grub screws tight, but the rear CV had some marks and groves out of it from dirt and grit getting in, but the knuckle was fine, the rear diff didn't fell the best, but this could be the rear drive shafts and CV,s since they are pretty worn, but i didn't want to replace them till they fail.


just Incas on Monday ill order some diff parts for spare just for when the diff lets go, i was going to hold off on touching the diffs till my center diff and 50k silicone oil was here, so heres to hoping the rear diff holds together.
 
i took mm Merv out today i knew the rear diff wasn't right, but i took it out any way i went down to the river theres really soft yellow big sand pad its like running on the beach, a good spot for paddles i forgot all about this spot.

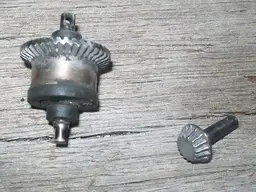
i was half way through the first battery pack and it started clicking i new it was the rear diff, but i kept driving till it was only front wheel drive then brought it home for inspection, be for i took it out i thought the inner gears where not that good but it was the crown and pinion gears.

the rear tires are totally full of sand, so my theory of the breather holes filling the tires up with sand while ballooning was correct like i thought (well to me), also be for i took it out today i checked the center drive shaft for wear in the CV, they looked fine but there was scratches and scrapes from dirt and rocks, but after one battery pack in the really soft stuff it looks alot worse.

100_3892.webp


100_3886.webp


100_3889.webp

as you can see the diff is full of sand and the pinion and crown is stuffed, i could of stopped this from happening but i didn't lolls i was hopping to get to 50 battery packs through the Merv and not touch the diffs till my center diff is here, but i only made it to 49 battery packs and 30 seconds of one 3s lolls.
 
Last edited:
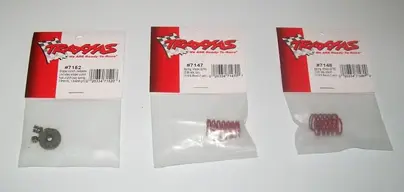
i traded my old man one of my parrallel charging boards and a couple of 50t spur gears for some traxxas black and tan springs and a slipper clutch set, so i might actualy replace my spur gear sine its looking ratty

100_3894.webp
 
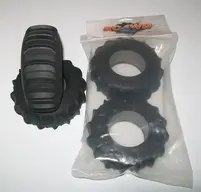
well thanks to zenburger84 from an aussie forum for my free sand storm paddles, they turned up today they look realy good im stoked, cant wait to mount them up

100_3896.webp
 
damn shane that thing is a donut machine! good thing its strong coz it looks like it wants to cartwheel quite easy, come with the scale u suppose!

DAMN 10amp charging! Impressive, thanks for the pics, im def going to have to buy one of those boards sooner or later!
 
one thing ive noticed when doing donuts is one rear tyre will unload balloon bad and push the merv over some times you can balance it on 2 wheel,s while donutting ifs funny to watch, im thinking thicker diff oil i got on order will help with that.
 
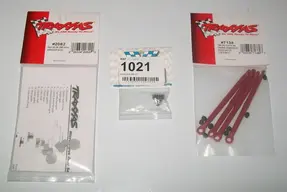
some more goodies turned up today, robinson racing 21t pinion gear, i used to use there gears on my nitro,s and i used them on my hpi baja 5b clone and liked them, spare stock servo gears and toe links front and rear, i need them as after 49 battery packs my rears are well worn.


100_3899.webp
 
Starting to realize you love getting mail.:laugh:


it shows that bad hey im a collectomaniac :lol:

parts for these in australia is very limited and over priced it will be apparent soon why im collect so much stuff for the up and comming rebuild, pluss im stock parts for two mine and my old mans.
 
ive been asked a few times now is it worth getting a second hand merv and where did i get mine from and what stuff am i using, my thread might be a bit long to read every page so i thought ill make a post on what ive been using and how ive been using it, so i thought ill make this post in stead of send it one by one by email or pm.

since you can get the 2.4ghz mervs for around $285 usd plus delivery from ebay.com, a main hobbies or cheaper from tower hobbies with the discound codes, mabe second hand isnt the best since they are so cheap any way here is the list of stuff ive been using, ive used every thing in this post and been happy with it, ive save a heap of money.


charger minium

http://www.hobbyking.com/hobbyking/store/uh_viewItem.asp?idProduct=6792

power supply for charger

http://www.progressiverc.com/index....&category_id=2&option=com_virtuemart&Itemid=1

thats what ive orded and will use this charging board to charge more then one battyery at a time.

http://www.hobbyking.com/hobbyking/store/uh_viewItem.asp?idProduct=14856

or this cheap charge is what im using now, not the best or very acurate but it will do the job, it will charge 2 lipo,s at once and runs on 12 volt dc or 100 volt ac upto 240 volt ac mains house power

http://www.hobbyking.com/hobbyking/store/uh_viewItem.asp?idProduct=6478

if you don't like soldering you can use this adaptor for the i max b6 ac main charge lead, to charge the lipo,s ive sugessted.

http://www.hobbyking.com/hobbyking/store/uh_viewItem.asp?idProduct=10257

2 cell lipos i suggest these ive been using them with great results, looong run time

http://www.hobbyking.com/hobbyking/store/uh_viewItem.asp?idProduct=6540

if you don't like soldering use these for the batteries so you can use the batteries on the mini e revo

http://www.hobbyking.com/hobbyking/store/uh_viewItem.asp?idProduct=10261

if you can solder and want to do it use these for the batteries if your using traxxas plugs

http://www.hobbyking.com/hobbyking/store/uh_viewItem.asp?idProduct=9762

if you want 3 cell lipo,s these just fit

http://www.hobbyking.com/hobbyking/store/uh_viewItem.asp?idProduct=6293

if you want a cheap traxxas parallel y harness

http://www.hobbyking.com/hobbyking/store/uh_viewItem.asp?idProduct=9741

if you want a cheap traxxas series connector

http://www.hobbyking.com/hobbyking/store/uh_viewItem.asp?idProduct=9740

for other traxxas items look here

http://www.hobbyking.com/hobbyking/store/uh_power_Search.asp

the batteries ive suggested are the biggest that will fit with the biggest mah giving the longest run times that i know off that are good and are sold for a great price, but will need 1/4 inch or aproxx 5mm cut off the rear off the battery doors for the lipo wires (see picture i posted up when i first got them on this thread)

some guys not keen on solderings and on a budget, so ive come up with this to help them out, if you use the the cheap i max b6 ac charger like ive suggested or some thing simular with a male tamiya main charge lead.

http://www.hobbyking.com/hobbyking/store/uh_viewItem.asp?idProduct=6478

mine came with a tamiya main charge lead, (hope they still do so you might want to confirm) so if your not keen on soldering i would suggest this

http://www.hobbyking.com/hobbyking/store/uh_viewItem.asp?idProduct=8324

if you want use the zippy lipo,s i suggest

http://www.hobbyking.com/hobbyking/store/uh_viewItem.asp?idProduct=6540

use this connector to use the lipo batteries on the car

http://www.hobbyking.com/hobbyking/store/uh_viewItem.asp?idProduct=10261

if you don't like soldering use these so you can charge the lipos batteries

http://www.hobbyking.com/hobbyking/store/uh_viewItem.asp?idProduct=10257

now if you want to charge more then one battery at a time safly use this

http://www.hobbyking.com/hobbyking/store/uh_viewItem.asp?idProduct=14856

if you want to charge the stock traxxas nimh batteries with the imax b6 ac charger or a simular charger with a male tamiya main charge lead you will need this adaptor

http://www.hobbyking.com/hobbyking/store/uh_viewItem.asp?idProduct=8324

now this is for people who don't like soldering, its not ideal but safe every thing here listed will work with each other, its cheap and it will get you going with out having to buy a soldering iron and learning to solder if thats what you want to do, or if soldering lipos worries you, but in this hobby learning how to solder is important and you can use the skill for many things like car stero installs, fixing electrical items and so on.

sorry if not all items are in stock at the time if you actualy check the links, most of these items at hobby king have a quick turn around, but this thread will give you a good idea of whats needed, if you are willing to solder or are not keen on soldering.

 
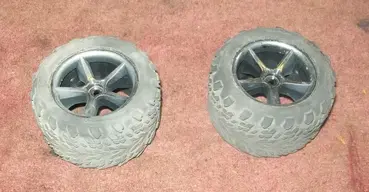
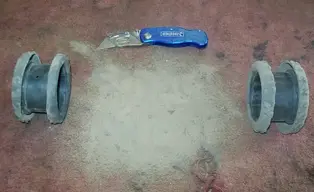
here is a couple of stock tyre/rims one spent most of its life on the front and the other most of its life on the rear, one had a little bit of dirt under the foam between the rim the other had a fair bit of dirt in it and you could feel it was more heavy then the others, i was able to pull one side of the glued tyre off and clean it out and reglue it but after a few lipo more battery packs they both where full of dirt.

100_3900.webp

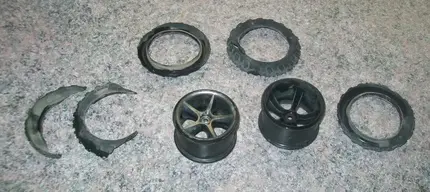
in this picture you can see how much dirt i got out of them after a few battery packs, the foams felt heavy and more so around where the breather holes would be on the rims, this is the problem ive been having with the stock tyres and rims, ive worked out its from running on dirt or sand when the tyres balloon it stucks in the dirt through the two large breather holes in the rims, ive been able to run some electrical tape around 2 other rims to block the breather holes and this has been stopping the dirt from entering the rims and getting stuck between the rims and foams and helps with ballooning also. two other tyres i cut up the other day had even more dirt in them and the foams felt very heavy embedded with dirt around where the breather holes are on the rims.

100_3901.webp

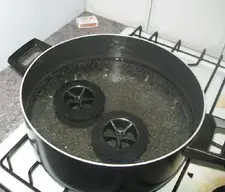
this is how i remove the old tyres of the rims i boil them for about 15 mins turning them over every few mins, i use an old pot or the wife gets upset, you can feel when the rubber is ready to come of cause its brittle and by this stage the glue has lost most of its grip and you can peal them off, i clean the groves of the rims up with a small flat blade screw driver, then they are ready for new rubber to be glued on.

100_3902.webp

100_3903.webp

when my new stock tyres and foams get here ill take a couple pictures of the breather holes and them being tapped befor i glue on the new tyres with thin ca glue
 
Back
Top