Stripped out threads for axle tube

This site may earn a commission from merchant affiliate
links, including eBay, Amazon, and others.
Messages
446
Location
Montreal
Any of you guys have this happen?
Your out for a leisure ride doing donuts and flying off a small jump repeatedly, then when you finally roll the truck over you notice a screw sitting on the snow and you wonder first, what are the chances of even seeing it on the snow, then the terror of where did that come from!
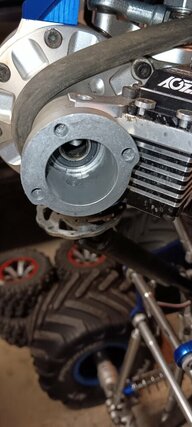
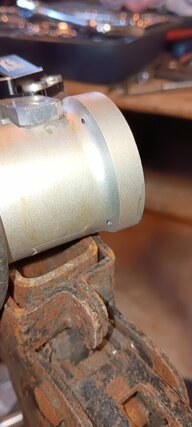
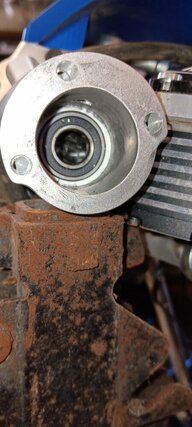
Got it inside and after a brief exam I saw two missing for an axle tube. No problem I figured, I got lots of screws... then I thought, ouhps, maybe it's broken and the threads are hidden. So I tore it all down to find the bolts was gone but it took the threads out of the diff housing, and the other two where damaged as well.
Checked for the parts and I can get the housing, but I can't stop wondering if I can tap a bigger bolt into the hole or even drill and put a heli coil thread repair insert.
I really doubt there is enough meat left to do that just wondering.
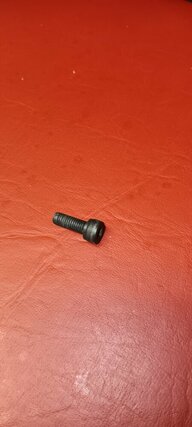
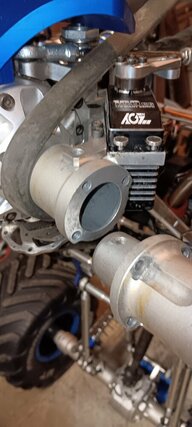
20240204_195902.jpg

20240204_195845.jpg

20240204_195811.jpg
 
By looking at your pic's, there should be enough room to tap it out to the next size up, it looks like a m4 bolt, you should be able to tap it out to a m5
Shouldn't have to drill, just tap the next size up
 
I'm pretty sure those are m5 bolts. I'd opt for a steel thread insert and use red loctite to lock the insert down. There's alot of weight hanging off that hub, you probably have one more shot with that axle housing if you tap to the next size and it happens again.
 
hey thanks guys! i love your optimism and encouragement! it may be really thin after drilling for a thread insert but is always stronger after that type of repair. taping for the next size up would also be stronger but the head of the bolt may be tricky to get into the recess cut into the tube. the shock bracket also helps hold this joint together with bolts on bolt pieces. also helping is the tube slips into the housing so these three bolts help more prevent rotation. i'll sleep on it then see what i can come up with and post pics to help the next guy to have this question. this thing is way to much fun in the snow so i won't let it sit broken for long
 
The center section will not take a nut. If it did you would have to relieve the tube end on the center section and maybe a low profile style nut.
A standard headed bolt and nut will not work. A bolt will not even work where the current socket head screw goes.
 
Hi guys! Thanks for all the input. Before I could finish my morning coffee I was on line checking for thread repair kits. The brand we all know best is helicoil, it's as well understudy as asking for a kleenex!
I was finding kits with many sizes on Amazon and got to thinking I couldn't even wait a couple days for shipping and for it to be so cheap the quality of the materials was surely going to be affected.
In my experience on 1:1 cars I've only ever used helicoil mostly, when a spark plug would get spit out of a Ford pick up or any other I would definitely go with a full sleeve time sert. The heat of combustion and the machined end of a time sert sleeve are a must to have the best chance.
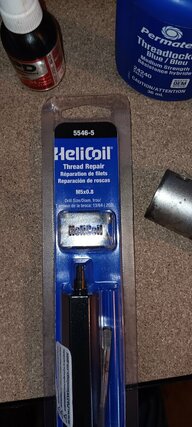
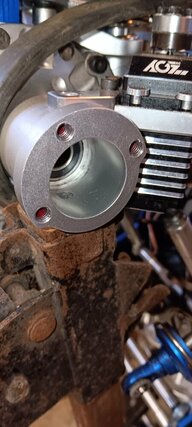
This morning I managed to put my hands on a one size helicoil kit. I'm very happy with the way it worked and am watching the coils as I wait for the loctite to set before putting the bolts back in and have them stick in as well.
So far the coils haven't jumped back out but I've got my eyes on them! Lol
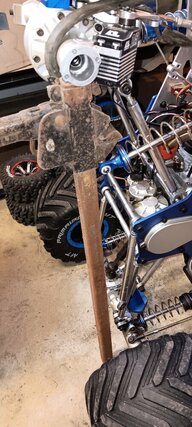
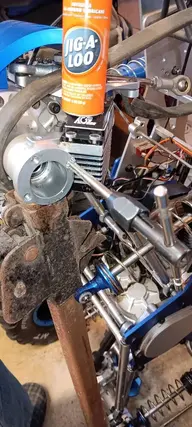
I feel vindicated to all the people that tell me I hang on to old junk for nothing ... ha! An old bumper jack from back in the days when you could hold up a car by the bumper to change a tire turned out to be the perfect stabilizer to the semi disassembled diff. I moved an old wooden school desk just perfect to support my elbow to hold the drill steady and put a knee against the diff housing and my drill press was ready for aircraft precision! Another joke but it works best with a steady hand! Got the old threads drilled out no problem but when the bolts pulled out they pulled out enough meat to expose tiny holes where I should have stopped just before but in they end the worked great at bleeding out the excess loctite as the tool threaded in the coil.
The helicoil kit has the proper (secret) size tap marked 5mm insert on it that I used my own t handle to turn it in and back it off to break the burs as it cut in, your favorite cutting oil or in my case some jig-a-loo works great to keep things cutting smoothly.
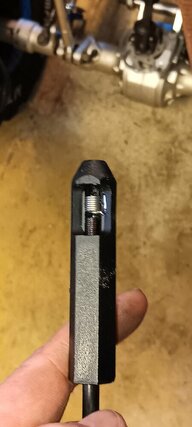
The kit also has a neat little plastic guide to drop the coil in then as you push it in it threads the coil down to match the hole your going into making getting that coil all in, in perfect shape easy.
I hope this was as much fun to read about as it was to do! I feel confident these coils will hold in better than the bolts threading into aluminum. But I can't promise I won't find a way to break more stuff.

20240205_122728.jpg

20240205_132124.jpg

20240205_132358.jpg

20240205_132817.jpg

20240205_134008.jpg

20240205_135806.jpg

20240205_140301.jpg
 
There is no doubt that the insert will be as strong if not stronger.
Just be careful that the end of the insert is below the surface. If it sticks up just take the Dremel and lightly grind anything off that might be sticking up.
 
Hi guys! Thanks for all the input. Before I could finish my morning coffee I was on line checking for thread repair kits. The brand we all know best is helicoil, it's as well understudy as asking for a kleenex!
I was finding kits with many sizes on Amazon and got to thinking I couldn't even wait a couple days for shipping and for it to be so cheap the quality of the materials was surely going to be affected.
In my experience on 1:1 cars I've only ever used helicoil mostly, when a spark plug would get spit out of a Ford pick up or any other I would definitely go with a full sleeve time sert. The heat of combustion and the machined end of a time sert sleeve are a must to have the best chance.
This morning I managed to put my hands on a one size helicoil kit. I'm very happy with the way it worked and am watching the coils as I wait for the loctite to set before putting the bolts back in and have them stick in as well.
So far the coils haven't jumped back out but I've got my eyes on them! Lol
I feel vindicated to all the people that tell me I hang on to old junk for nothing ... ha! An old bumper jack from back in the days when you could hold up a car by the bumper to change a tire turned out to be the perfect stabilizer to the semi disassembled diff. I moved an old wooden school desk just perfect to support my elbow to hold the drill steady and put a knee against the diff housing and my drill press was ready for aircraft precision! Another joke but it works best with a steady hand! Got the old threads drilled out no problem but when the bolts pulled out they pulled out enough meat to expose tiny holes where I should have stopped just before but in they end the worked great at bleeding out the excess loctite as the tool threaded in the coil.
The helicoil kit has the proper (secret) size tap marked 5mm insert on it that I used my own t handle to turn it in and back it off to break the burs as it cut in, your favorite cutting oil or in my case some jig-a-loo works great to keep things cutting smoothly.
The kit also has a neat little plastic guide to drop the coil in then as you push it in it threads the coil down to match the hole your going into making getting that coil all in, in perfect shape easy.
I hope this was as much fun to read about as it was to do! I feel confident these coils will hold in better than the bolts threading into aluminum. But I can't promise I won't find a way to break more stuff.

View attachment 91770

View attachment 91771

View attachment 91772

View attachment 91773

View attachment 91774

View attachment 91775

View attachment 91776
Great job …..

The end result is a much stronger setup.
 
Hi guys! Thanks for all the input. Before I could finish my morning coffee I was on line checking for thread repair kits. The brand we all know best is helicoil, it's as well understudy as asking for a kleenex!
I was finding kits with many sizes on Amazon and got to thinking I couldn't even wait a couple days for shipping and for it to be so cheap the quality of the materials was surely going to be affected.
In my experience on 1:1 cars I've only ever used helicoil mostly, when a spark plug would get spit out of a Ford pick up or any other I would definitely go with a full sleeve time sert. The heat of combustion and the machined end of a time sert sleeve are a must to have the best chance.
This morning I managed to put my hands on a one size helicoil kit. I'm very happy with the way it worked and am watching the coils as I wait for the loctite to set before putting the bolts back in and have them stick in as well.
So far the coils haven't jumped back out but I've got my eyes on them! Lol
I feel vindicated to all the people that tell me I hang on to old junk for nothing ... ha! An old bumper jack from back in the days when you could hold up a car by the bumper to change a tire turned out to be the perfect stabilizer to the semi disassembled diff. I moved an old wooden school desk just perfect to support my elbow to hold the drill steady and put a knee against the diff housing and my drill press was ready for aircraft precision! Another joke but it works best with a steady hand! Got the old threads drilled out no problem but when the bolts pulled out they pulled out enough meat to expose tiny holes where I should have stopped just before but in they end the worked great at bleeding out the excess loctite as the tool threaded in the coil.
The helicoil kit has the proper (secret) size tap marked 5mm insert on it that I used my own t handle to turn it in and back it off to break the burs as it cut in, your favorite cutting oil or in my case some jig-a-loo works great to keep things cutting smoothly.
The kit also has a neat little plastic guide to drop the coil in then as you push it in it threads the coil down to match the hole your going into making getting that coil all in, in perfect shape easy.
I hope this was as much fun to read about as it was to do! I feel confident these coils will hold in better than the bolts threading into aluminum. But I can't promise I won't find a way to break more stuff.

View attachment 91770

View attachment 91771

View attachment 91772

View attachment 91773

View attachment 91774

View attachment 91775

View attachment 91776
Nice job. I catch flack from hoarding stuff too but more often than not, I end up using some of it. A sure fire way of needing something it getting rid of it. Lol
 
Nice job. I catch flack from hoarding stuff too but more often than not, I end up using some of it. A sure fire way of needing something it getting rid of it. Lol
Few year back my wife put her foot down and I cleaned out. Sold/gave away/ threw out tons of old stuff. Nearly all the k series kohler stuff, (in fairness to her, I only have one 14hp engine left.) Lots of small engines in varrious states of repair, all the case Ingersoll parts I had, bunch of saws, misc small equipment, tons of old throttle and choke cables, wheels, saw chains, saw blades etc.... still kicking myself to this day for getting rid if a lot of it. Especially now that I'm building a shop and everything will be leaving the basement and shed.. never know when you need an odd tid bit to fix something.
 
Few year back my wife put her foot down and I cleaned out. Sold/gave away/ threw out tons of old stuff. Nearly all the k series kohler stuff, (in fairness to her, I only have one 14hp engine left.) Lots of small engines in varrious states of repair, all the case Ingersoll parts I had, bunch of saws, misc small equipment, tons of old throttle and choke cables, wheels, saw chains, saw blades etc.... still kicking myself to this day for getting rid if a lot of it. Especially now that I'm building a shop and everything will be leaving the basement and shed.. never know when you need an odd tid bit to fix something.
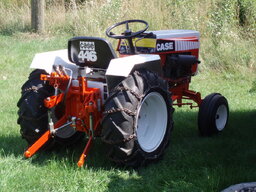
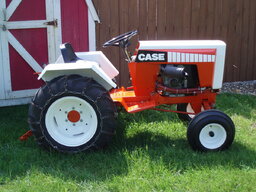
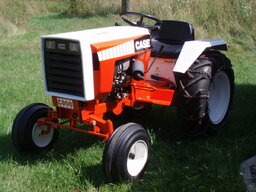
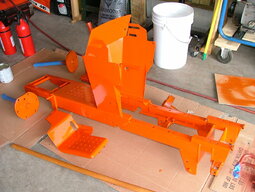
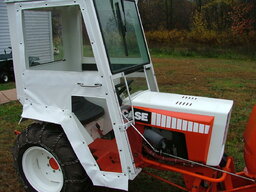
I was into case / ingersoll tractors back in the day. I did a full resto / mod on a 446. Every nut and bolt was apart. Repowered with a 21 hp Kawasaki. Custom paint and decals. I also had a 222 and a 3016

tractor restore 032.jpg

tractor restore 031.jpg

tractor restore 030.jpg

tractor restore 021.jpg

RESTORED CAB AND BLOWER ON CASE 005.jpg
 
Back
Top
AdBlock Detected

We get it, advertisements are annoying!

Sure, ad-blocking software does a great job at blocking ads, but it also blocks useful features of our website. For the best site experience please disable your AdBlocker.

I've Disabled AdBlock    No Thanks