Another Taylor 50GT “Grave Digger” Engine ….

This site may earn a commission from merchant affiliate
links, including eBay, Amazon, and others.

Shad0man

Well-Known Member
Messages
192
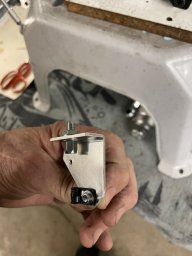
After several conversations with Dan and Mike Taylor regarding the 50 GT in the Grave Digger I pulled the proverbial trigger. My initial reluctance was the exhaust. I don’t like having to remove the driver, and cutting the roll cage. I also like how the factory exhaust exits. In any case, I discussed the exhaust concern with both Dan and Mike but at the moment there is no simple answer. For now I have a complete second Grave Digger body and roll cage that I will install when it is on static display. To do this is painless, I will have to remove the 2 muffler springs and one nut so the muffler can be removed after which the spare Grave Digger body complete with driver will set in place.

Onward…

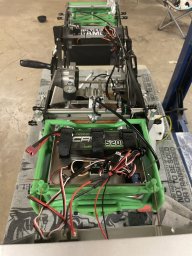
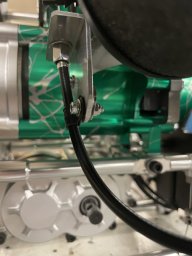
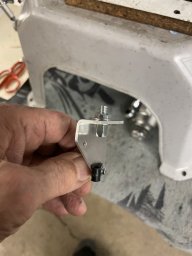
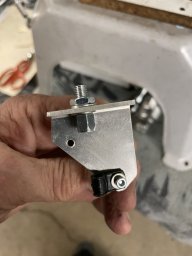
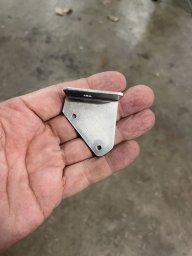
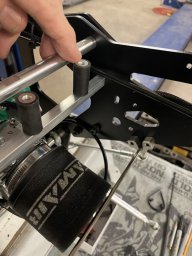
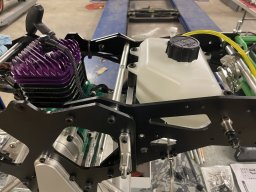
The engine arrived and looks very fitting of the Grave Digger, in fact, it looks better in person. The Grave Digger/Raminator’s are IMO, mechanical artwork and Mike’s GD engine is too. I did remove Mike’s machined aluminum plate that he mounts the red momentary kill switch on as it was not going to be used. Per Mike’s recommendation I simply removed the plate and inserted a 3mm shim in the resulting slot and then retorqued the pull start cover bolt. Once the engine is installed I’ll create a proper length ground wire that will go between the coil and the factory toggle switch.

So the transformation, upgrades, and preemptive maintenance is under way.

All of this after less than 1/2 tank of fuel having been run through the stock engine.

I am not looking for high speed runs but rather more spirited low to moderate speed activities such as jumps, wheelies, donuts. etc. Just a more lively Grave Digger.

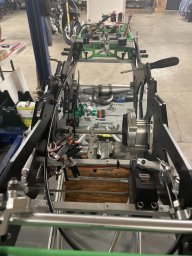
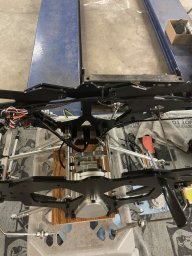
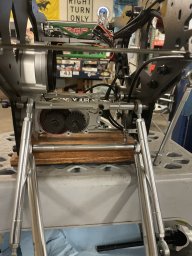
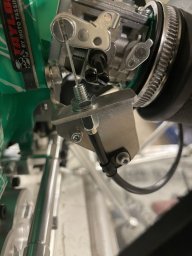
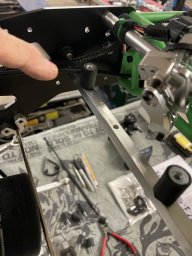
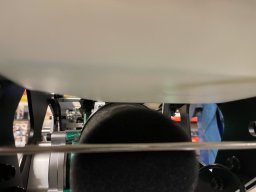
During the swap I opted not to cut the chassis side panel. Removing a few bolts and loosening a few others was a straightforward process and did not take very long.

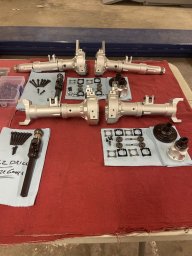
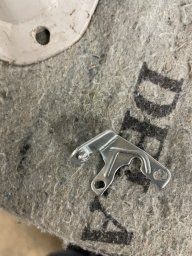
While engine is being swapped the differentials are being serviced and upgraded per John Parks suggestions and am very glad I did. I also swapped the transmission gearing back to 25/25 during which I found the 2 set screws on the transmission gear hex nut on F/R synchronizer shaft were loose. I did not check them when I initially swapped the gearing and added grease. I have already inspected and greased the drive chain and gears.

The Primal RC’s whether it be a Grave Digger, Raminator, or Mega Monster Truck, all have the hallmarks of a very cool never-ending process. They are as enjoyable to look at and tinker with as it is to see them operate under their own power. We have other RC’s including other 4 wheeled rigs such as the Baja 5B and the Baja 5T that are also cool but fill a different niche for us. The Primal RC is a very unique piece surrounded by an endless array of something else.

I read many great comments intermixed with some that share disappointment, frustration, and unfulfilled expectations. I do understand and can relate but I never stop smiling. It’s a hobby as such it’s the processes that keep most going and not the highs or lows of a simple moment in time.

Takes care
 

Attachments

  • IMG_6860.jpeg
    IMG_6860.jpeg
    203.3 KB · Views: 31
  • IMG_6862.jpeg
    IMG_6862.jpeg
    160.9 KB · Views: 33
  • IMG_6866.jpeg
    IMG_6866.jpeg
    153.4 KB · Views: 35
  • IMG_6867.jpeg
    IMG_6867.jpeg
    175.2 KB · Views: 31
  • IMG_6868.jpeg
    IMG_6868.jpeg
    158.3 KB · Views: 29
  • IMG_6861.jpeg
    IMG_6861.jpeg
    163.9 KB · Views: 32
Thank you all for the kind words.

After installing the engine I was all smiles. However, when I hooked up the throttle cable it was apparent that it was an act of form follows function. Mike’s process of hooking up the throttle cable involves using a bracket off the original carburetor and mounting it to the stainless steel bracket he furnishes that is already on the engine. Certainly it works but IMO, it did not look integrated but rather, appeared as an afterthought.

Furthermore, by using the bracket off the factory carburetor attached to the stainless steel bracket that Mike furnishes the throttle cable is pulled at a significant off angle. Add to this I watched a few videos where the throttle cable sheathing would be pulled out of the sheathing barrel holder during throttle/brake operations often getting stuck outside of the sheathing barrel holder resulting in the 80lbs rig being stuck at full throttle. All of the fixes I saw used zip ties to secure the cable sheathing. Even though their fix is functional; it is far from looking like a forethought.

So while waiting for some differential hardware to arrive I proceeded to compliment Mike’s stainless steel throttle cable bracket and the hardware he supplied by fabricating a simple bracket rather than use the one off the original carburetor.

My simple bracket looks integrated, creates a perfectly aligned cable pull, allowed for more of the cable to extend through the servo arm, has a provision to secure the cable sheathing so no risk of experiencing wide open throttle, and no zip ties.

When completed I reset the throttle end point which is now about 80% and the throttle operation is smooth as butter.

The first picture is the bracket that I removed from the original carburetor but opted not to use and the subsequent pictures are of the simple bracket that I fabricated.

Takes care
 

Attachments

  • IMG_6901.jpeg
    IMG_6901.jpeg
    91.7 KB · Views: 19
  • IMG_6900.jpeg
    IMG_6900.jpeg
    113 KB · Views: 18
  • IMG_6898.jpeg
    IMG_6898.jpeg
    88.4 KB · Views: 18
  • IMG_6897.jpeg
    IMG_6897.jpeg
    82.1 KB · Views: 17
  • IMG_6896.jpeg
    IMG_6896.jpeg
    83.3 KB · Views: 17
  • IMG_6893.jpeg
    IMG_6893.jpeg
    90.2 KB · Views: 17
  • IMG_6899.jpeg
    IMG_6899.jpeg
    196.9 KB · Views: 17
A “very” good observation; one I had not considered.

The inverting of the throttle cable and creating a dirt collecting “funnel” is the design of this engine’s installation nevertheless, thanks to you I will be installing a rubber cone of sorts over the threads with only the the cable exposed.

I appreciate your comment and suggestion.
 
Oh! Grave digger, first time I saw the post I thought GD ment gosh darn, if you know what I mean. Lol
In real @!$^&$#! Format. I don't think my u tube channel will last very long if I start recording my voice. Lol I tend to curse loudly. Just got done mowing the lawn (with the lawn tractor) and the first thing my dad asked was what happened when you were cursing, tree branch knocked my sunglasses off, so I started breaking the low hanging branches and cursing
 
Personally I don't think this platform is meant for me, don't see the appeal, would not spend the money.... HOWEVER, I love that it exists, and your project is a prime example of how great the hobby is.
Love the details you are including on this build. Keep the updates coming
 
Hi Enzo

First of all, it is very cool that you look at the threads and engage. Whether it’s your thing or not you are still one of the many in the very diverse RC community.

It is a very unique platform and as I have shared, I do not see it as a replacement for or a comparable to another but rather, a RC with a very nice niche audience. Most folks think they are cool, enjoy seeing them, and can appreciate them but once the proverbial dust settles I agree that they are not for everyone for many reasons.

They are expensive, large, heavy, awkward if not impossible for some to transport, and heaven forbid if breaks down, dragging a 80lb weight is a process. Nonetheless, IMO, they are mechanical art that can be exercised. For myself, they are as cool to look at as they are to be exercised.

Who knows, one day you may awake in cold sweats needing one too. If not, your remaining vicariously involved is awesome too.

So, as part of the Taylor 50 Grave Digger engine integration one needs to raise the fuel tank. A simple process that’s been approached a variety of ways. I told Mike my intention and here it is.

I used rubber isolators threaded for M5 bolts and nuts that self thread into the two cross bars and then use short 5mm cap bolts to secure the fuel tank to the rubber isolators. I opted to use slightly longer rubber isolators in the front, 30mm x 15mm diameter to insure 100% clearance between the fuel tank and the air filter. In the rear I used 20mm x 15mm diameter that work just fine and allows for clearance between the fuel tank and Mike’s muffler bracket. Once in place they look as if part of Dan’s original design.
 

Attachments

  • IMG_6935.jpeg
    IMG_6935.jpeg
    130.8 KB · Views: 7
  • IMG_6936.jpeg
    IMG_6936.jpeg
    120.9 KB · Views: 6
  • IMG_6937.jpeg
    IMG_6937.jpeg
    143.4 KB · Views: 7
  • IMG_6938.jpeg
    IMG_6938.jpeg
    149.9 KB · Views: 6
  • IMG_6939.jpeg
    IMG_6939.jpeg
    85.7 KB · Views: 8
  • IMG_6940.jpeg
    IMG_6940.jpeg
    191.3 KB · Views: 7
Last edited:
They are expensive, large, heavy, awkward if not impossible for some to transport, and heaven forbid if breaks down, dragging a 80lb weight is a process.
Woah, dragging it back?!!! You mean trailering it back not by your own power right? You’re scaring me because you could seriously hurt yourself!

I’m working on the next trailer version to keep the tires on, maybe a tool holder, room for extra RCs, ramp, etc... This original trailer is my fishing cart I’ve had forever and is pulled by a stretched and customized 4ws SCX6. The fifth wheel setup is where it is at for heavy loads.

IMG_3661.jpeg
 
Man that sure beats draging with all 4 wheels locked up like me.I just tweaked my brackef to fix throttle because it pushed cable out and hang up.Was very detailed doing install and caught any issues before 1st run with taylor50.Initial fire up for break in went well.I am finding that if its been run recently,choke on ,second pull engine pops ,choke off throttle barely cracked starts every time. But when its sat for 2 weeks and have to open

tank to fill, it takes 2 pulls with chock still closed after first pop to prime or it wont fire....Truck looks great Shadoman !!!!!!!!
 
Hi Mick

I can not imagine dragging 80lbs, much less with all 4 wheels locked up any distance at all. I think I’d just leave it sit and put a for sale sign on it; LOL.

I am glad you resolved the throttle cable sheathing being pushed out issue. When a throttle sticks, particularly at WOT things can happen very quickly, often before there’s time to press the kill button.

Thank you for sharing your starting experiences. That which you shared is similar to comments that Mike shares with me.

And, your kind words regarding my rig are appreciated.

Takes care.
 
Back
Top
AdBlock Detected

We get it, advertisements are annoying!

Sure, ad-blocking software does a great job at blocking ads, but it also blocks useful features of our website. For the best site experience please disable your AdBlocker.

I've Disabled AdBlock    No Thanks