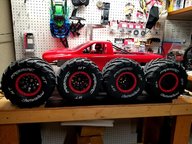
RickDizzle's Raminator Build

This site may earn a commission from merchant affiliate
links, including eBay, Amazon, and others.

RickDizzle

Isaiah 41:10
PLUS member
Build Thread Contributor
Messages
1,377
Well the day has come, my Raminator arrived today all the way from NY. I plan to document my build from start to finish. I am by no means a photographer, so bear with me. I have a crazy work schedule until the end of next week, so the build will be slow at first with just some basic stuff done in my spare time, then should move nicely during my time off. So with out further talking here we go!

Truck arrives from Primal packed very well. It will arrive in 2 boxes. Box 1 is the larger and box 2 is the smaller.
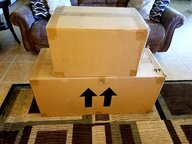
20201014_171802.jpg
Box 1 contains: the truck itself, two wheels and tires, three sets of decals, the manual, another small box with a bag of tools, transmitter, charger for the included Rx battery.
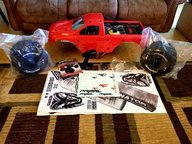
20201014_171816.jpg
Box 2 contains: Two other wheels and tires, 2 smaller boxes, one with the front axle and the other with the rear axle, trucks axles, brake cables, brakes, 4 shocks, optional gears, the links for the sway bars, second set of locking ends for the brake cables, drive shafts and what appears to be a reverse lock out.
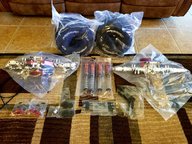
20201014_171828.jpg
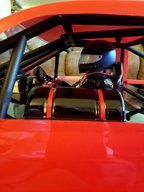
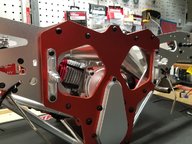
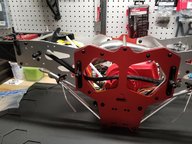
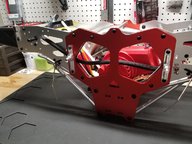
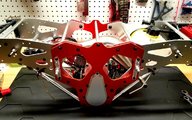
Overall, very impressed with the quality of this machine. And the size...I knew it was big...but seeing it in person changes perspective. Truck looks great from the start.
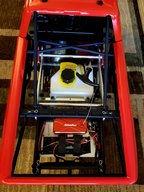
20201014_171842.jpg
20201014_172033.jpg
20201014_172048.jpg
20201014_171903.jpg
I have been collecting goodies for this build past several months. I will be running a second set of shocks on each corner (no springs) JS Performance aluminum aftermarket upgrades throughout care of Mike at RCMax, upgrading the fuel system and venting it, adding a Bartolone velocity stack and more goodies from DDM just to start.
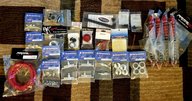
20201014_172104.jpg
Tonight after unboxing and checking everything over, only thing I did was take the decal sheets and place them between a mattress and box spring. They come well packed but do have some rolling in them and a few light creases. After several days of being between the mattress and box spring, they should be pretty flat and prevent weird rolling and creases. Over the next several days I will be doing some basic things (changing out beadlocks, changing the stock body mounts to the JS Performance ones and so on.) Pics and details to come each time I wrench on this beast! Thanks for following and input is always appreciated!
 
Last edited:
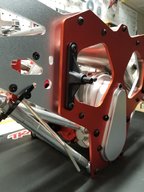
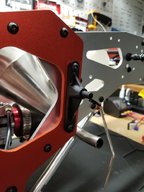
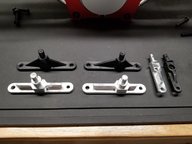
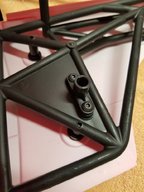
Tonight I removed the stock plastic body posts/mounts and installed the JS Performance aluminum ones. They are an exact 1 for 1 fit. In all my research, I found that the stock plastic ones can be a weak point and snap. The aluminum ones resolve that issue. A few pics before and after.
20201015_190958.jpg
20201015_190944.jpg
20201015_190933.jpg

Here is a comparison of the stock vs the JS Performance ones.
20201015_192809.jpg

Installed
20201015_194240.jpg
20201015_194249.jpg

Other side before and after.
20201015_194355.jpg
20201015_195847.jpg

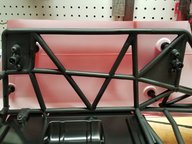
The next weak point is in the cage itself. Primal did a great job of making the connection points in the cage replaceable. Here are the female connections on the cage.
20201015_203909.jpg
20201015_203947.jpg

JS Performance also makes aluminum ones of these. However I think I am going to just run plastic for them. I'd rather break these and replace the female tab, vs reinforce it and then break the cage its self. Just seems more effective to have those small replacable points as weak points vs the cage itself. More to come next time I get to wrenching.
 
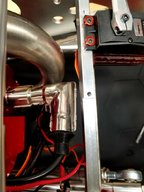
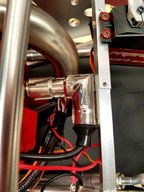
Didn't get any wrenching time in today. Busy with work. Can't wait to jump into the bigger aspects of this build at the end of next week and get her fired up. I am loving everything about this truck so far. The ONLY issue to this point, and its not really an issue more of an inconvenience. The spark plug wire boot can't be removed and put back on unless you remove one of the crossbar supports that hold the brake servo. So you need to undo that brace and two of brake servo screws. Not a deal breaker at all, just a tad of an inconvenience. And be clear the screws, nuts and bolts on this rig are loctited like a son of a gun. So some will need heat to remove so you don't strip heads.
Pic of the boot fully pushed on:
20201016_230843.jpg

As far as it comes off, hits the brace/brake servo mount:
20201016_230901.jpg

Will try to get a couple small things done over next couple days and post that stuff. ??
 
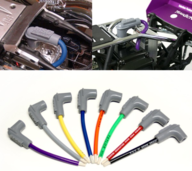
Think I'd be getting a standard boot for the plug. And or modifying that brace. Would drive me mental the first time I had to go after the plug, and needed more then a plug wrench.
I think a standard boot plug would alleviate the issue. I was able to pull and push down as I pulled and get the boot off. Lil more force then I would prefer. And now there is no way of going back on with that brace in place. Being new to gas RC...is there a preferred boot end and forgive my lack of knowledge, but what is the purpose of the metal outer on this boot? Does it act as a ground? An all rubber outer boot with the ability to flex would truly fix it if that metal jacket isn't required.
 
I think a standard boot plug would alleviate the issue. I was able to pull and push down as I pulled and get the boot off. Lil more force then I would prefer. And now there is no way of going back on with that brace in place. Being new to gas RC...is there a preferred boot end and forgive my lack of knowledge, but what is the purpose of the metal outer on this boot? Does it act as a ground? An all rubber outer boot with the ability to flex would truly fix it if that metal jacket isn't required.
Theres no real reason for the metal shield. The plug is grounded through the block. Any old plug cover will work just fine. The ones mentioned above are better looking then the stockers.
 
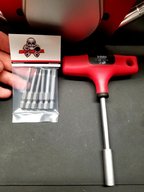
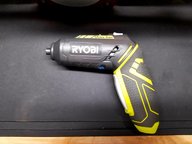
Thanks for the replies on the spark plug boot fellas! I will probably initially run the one on the truck for a bit and just pull the brace to get it off. Prevents me from having to pull the engine and or an entire side frame off the truck. Down the road will be changing this engine out for something with more power, so no need for extra work now. Pulling the brace was an experience tonight. There was sooooo much loctite used on this thing during factory assembly. I am using good bits from Mike at RC Max. And still rounded a head. I even used a soldering iron on it. Was only a 25 watt iron, so will probably go to a 80 or 100 watt iron to attempt to remove others lol. Ended up having to slot the head and use a large flat head screwdriver to get it out. Was truly shocked at how much loctite was on it.
These are the bits, hand driver and electric driver I'm using thus far:
20201017_214115.jpg
20201017_214056.jpg
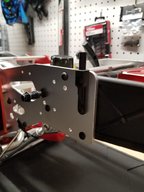
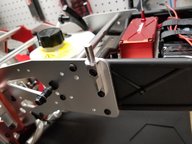
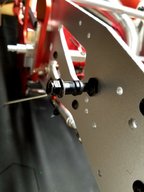
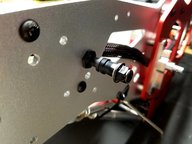
Today I had a lil bit of time. I decided to go ahead and pull the stock shock mounts and install the JS Performance ones. The JS ones are nice, one piece aluminum and much more beefy. While I am running the 8 shock set up, I only installed the first four in their original location. I want to see the position of the axle and the measure what mounting hole I want to go to for the second set that will be run without springs. So those will get installed when the truck is closer to final assembly.

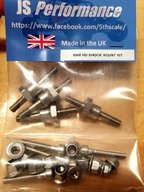
This is how the set comes, one set will do four shocks:
20201016_230209.jpg

Stock ones on the truck:
20201017_212614.jpg
20201017_212625.jpg

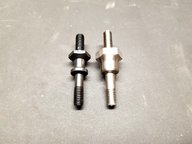
Comparison of the stock ones vs JS Performance, they are so much beefier :
20201017_212713.jpg

Installed on the truck:
20201017_213506.jpg
That is it for tonight...more to come!
 
Thanks @crucialRC ! I have a small butane pen torch and that 25w soldering iron currently. Was tempted to use that pen torch but afraid it would damage the coated aluminum and the anodized aluminum if the heat spread to much. How well do heat guns work and is a pretty safe route? If so ill gladly pick one up before I continue on to other bolts.
 
Last edited:
Thanks @crucialRC ! I have a small butane pen torch and that 25w soldering iron currently. Was tempted to use that pen torch but afraid it would damage the coated aluminum and the anodized aluminum if the heat spread to much. How well do heat guns work and is a pretty safe route? If so ill gladly puck one up before I continue on to other bolts.
It's what I always use once i realize i may have a problem. Turn it on high and heat the bolt for about 10 sec and she usually comes out.
 
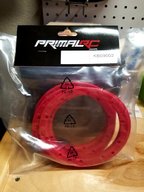
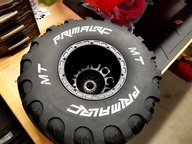
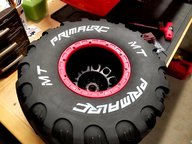
Decided after work wanted to do something small to the Raminator tonight. I went ahead and swapped out my beadlocks. Went from black to red. I think it will tie the body color into the massive black wheels and tires.
20201019_210505.jpg
20201019_210548.jpg
20201019_210532.jpg
20201019_210518.jpg

I have an extra set of red beadlocks, what you guys think...I wanna go for a clean "real" monster truck look....run the inside of the trucks beadlocks as stock black or run the other red ones on the inside as well? I have mixed feelings on this. Leaning towards keeping the insides black. Thoughts?
 
If you swap the spark plug boot out for a rubber one? I would wrap the header pipe area with header wrap. Looks awful close to the plug and the heat will soften or melt the plug boot.
 
Back
Top
AdBlock Detected

We get it, advertisements are annoying!

Sure, ad-blocking software does a great job at blocking ads, but it also blocks useful features of our website. For the best site experience please disable your AdBlocker.

I've Disabled AdBlock    No Thanks