Rampage MT & Rampage XB

This site may earn a commission from merchant affiliate
links, including eBay, Amazon, and others.
Great thread, tons of information. Just purchased a TT should arrive in a few days. Could you show pics of tempering the diff cups? Haven't really seen a step by step on it yet. Not really sure the whole process. Thanks again, learned alot from this thread.

Thanks. Glad it's been helpful. You'll love the vehicle, it's a lot of fun. There are some really great threads over at http://www.redcatrampageforum.com (sister site of LSF and HBF) which are super helpful as well. That's where I got most of my info from. Kryptonite, mooman and some of the other guys over there and here are great for information so don't hesitate to ask anything!

The tempering is pretty simple. I just ordered the diff cups so I should have them by the end of the week. I originally did this to all the cups but I took a pretty hard flip and all the weight landed on this side. Dogbones didn't bend or anything so that was a plus, although, I would have rather bent a dogbone then pull apart the gearbox. :(

The first time around I used one of those butane torches like one from Home Depot or Walmart. Cheap, comes with everything. I just basically heated it up until it turned blue and then let it cool down. Some people drop it in motor oil but I just let it cool. I think the motor oil is after you heat it to cherry red, but it doesn't need to go that far. I'll take some pics of it though when I do it which hopefully will be by the weekend.
 
hey csp, you can pull the rear diff out and leave most of the assembly in place...i can change out a diff in about 10mins, just pull off the bumper, take off the pin straps (if you still got the nibs on still push down on the chassis...it flexes enough to get the strap out... pull one lower arm pin out, undo the lower diff screws and the case screws, the push down on the chassis again and pull the back of the case off, then take out the dogbone on the one side and the diff can then be removed... before tempering I must have pulled my diffs apart a dozen times at least, had to do it a few days ago too as i finally broke a tempered cup shaft...
 
hey csp, you can pull the rear diff out and leave most of the assembly in place...i can change out a diff in about 10mins, just pull off the bumper, take off the pin straps (if you still got the nibs on still push down on the chassis...it flexes enough to get the strap out... pull one lower arm pin out, undo the lower diff screws and the case screws, the push down on the chassis again and pull the back of the case off, then take out the dogbone on the one side and the diff can then be removed... before tempering I must have pulled my diffs apart a dozen times at least, had to do it a few days ago too as i finally broke a tempered cup shaft...


Great info! Thanks moo!

So you left one half of the case still attached correct? I don't have the nibs, I did this mod that you did (https://www.largescaleforums.com/showpost.php?p=52348&postcount=55). I guess I should have thought it through longer. Took forever getting that stuff off. Now I know! :)
 
yep, the half case with the pinion stays in place...diff changes become much less of a hassle, even with my cage on I still have enough chassis flex once the lower diff screws are removed to pop the back of the case off..

I tested this out and it works perfectly. A heckuva lot easier than taking everything off!
 
Great thread, tons of information. Just purchased a TT should arrive in a few days. Could you show pics of tempering the diff cups? Haven't really seen a step by step on it yet. Not really sure the whole process. Thanks again, learned alot from this thread.

Projectgp:

I tempered the cups and tried to video them but the video ended up not so good. Decided to put it up on youtube anyway. Someone let me know if I didn't treat these things correctly!

http://www.youtube.com/watch?v=KYd6VcBvXzk

So basically it's pretty easy. Just turn on your torch, heat the shaft until it goes from blue to silver all the way down to the base (don't actually do the cup itself). You'll see it happen and I don't think you'll mess it up. It seems pretty easy. Oh yeah, let them air dry.

Also on the dogbones/outdrives....use green loctite (yes green) on both ends of the dogbone pins. Just put a little around the pin where it is in the ball and let it dry. You shouldn't lose any pins.
 
Last edited:
perfect tempering job there...exactly the way to do it.
I've never had or heard of anyone having problems with the wheel axles and as csp says green loctite all the dogbone pins..it seeps into micron sized voids and then sets...i've had my MT for 10mths and have never had one come out.
 
I now have all alloy arms to install. Hope to get these on this weekend while it is -20 degrees outside.
 
I have never tempered anything,but I thought the oil quench was part of the process. Here is something I found on the web about tempering steel.
http://www.ehow.com/how-does_4709215_steel-tempering-work.html
Below is a part of the article. very interesting read.

The Purpose of Tempering
Tempering is a process by which steel and other alloys (as well as glass) are hardened in order to create a stronger final product. Steel tempering requires multiple steps, with each producing slight changes in the steel that result in the metal becoming harder. Care must be taken while tempering steel, as it's possible to cause the metal to become brittle if it is heated or cooled too quickly or to too much of an extreme during the tempering process.
Austenizing and Quenching
The first step in tempering steel is a process known as austenizing. The steel is heated to over 1,200 degrees Fahrenheit in order to create a solid solution of carbon and iron, a process that occurs because of chemical changes occurring in the steel alloy at such a high temperature. Once the steel has been austenized, it must then be quenched in order to bring about the next change in the metal. Quenching causes the metal to cool quickly, dropping it past the point where the metal's structure can change and causing it to harden with an internal crystalline structure. Once this crystalline quality has been achieved within the steel, the main tempering process can begin.
Tempering the Steel
After austenizing and quenching have created a crystalline structure within the steel itself, the metal must be heated again in order to temper it. Steel can be tempered within two distinct temperature ranges, 300 to 500 degrees Fahrenheit and 700 to 1,200 degrees Fahrenheit. The range between 500 and 700 degrees is generally avoided, as this can produce a much more brittle steel. The metal is held at the tempering temperature in order to allow the carbon in the steel to break down slightly, spreading throughout the crystalline structure of the metal in order to reinforce it further.

Some steel will be tempered and quenched more than once, using different temperature ranges in order to guide the metal to the perfect hardness for its intended purpose; the steel may even be austenized again and allowed to cool more slowly before finally being quenched in order to produce certain pure forms of tempered steel. Great care must be taken when tempering or austenizing the steel additional times, as it is possible to make the steel brittle even when avoiding the 500 to 700 degree temperature range.
 
Last edited:
Yep read the same thing a couple months ago. I did it the tried and true method by people doing it on the Redcat Rampage Forum.
 
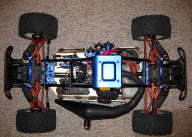
Mounted up the new alloy arms finally. I like the orange a lot. I forgot I also have an FG truck body for this thing. Just have to figure out a paint scheme.

IMG_7989.jpg
 
I have never tempered anything,but I thought the oil quench was part of the process. Here is something I found on the web about tempering steel.
http://www.ehow.com/how-does_4709215_steel-tempering-work.html
Below is a part of the article. very interesting read.

The Purpose of Tempering
Tempering is a process by which steel and other alloys (as well as glass) are hardened in order to create a stronger final product. Steel tempering requires multiple steps, with each producing slight changes in the steel that result in the metal becoming harder. Care must be taken while tempering steel, as it's possible to cause the metal to become brittle if it is heated or cooled too quickly or to too much of an extreme during the tempering process.
Austenizing and Quenching
The first step in tempering steel is a process known as austenizing. The steel is heated to over 1,200 degrees Fahrenheit in order to create a solid solution of carbon and iron, a process that occurs because of chemical changes occurring in the steel alloy at such a high temperature. Once the steel has been austenized, it must then be quenched in order to bring about the next change in the metal. Quenching causes the metal to cool quickly, dropping it past the point where the metal's structure can change and causing it to harden with an internal crystalline structure. Once this crystalline quality has been achieved within the steel, the main tempering process can begin.
Tempering the Steel
After austenizing and quenching have created a crystalline structure within the steel itself, the metal must be heated again in order to temper it. Steel can be tempered within two distinct temperature ranges, 300 to 500 degrees Fahrenheit and 700 to 1,200 degrees Fahrenheit. The range between 500 and 700 degrees is generally avoided, as this can produce a much more brittle steel. The metal is held at the tempering temperature in order to allow the carbon in the steel to break down slightly, spreading throughout the crystalline structure of the metal in order to reinforce it further.

Some steel will be tempered and quenched more than once, using different temperature ranges in order to guide the metal to the perfect hardness for its intended purpose; the steel may even be austenized again and allowed to cool more slowly before finally being quenched in order to produce certain pure forms of tempered steel. Great care must be taken when tempering or austenizing the steel additional times, as it is possible to make the steel brittle even when avoiding the 500 to 700 degree temperature range.

the highlighted section is bang on...but oil quenching and formation of austinite and marsenite is actually part of the hardening process not tempering..so this article is a touch misleading...tempering is not actually part of the hardening process but a process to give relieve stress within the crysral structure and give a measure of ductility to parts that require it...if you over heat during tempering and allow to cool slowly you reverse the hardening process (annealing)

i've been tempering the shafts at silver grey...about 900deg ( i say about cos i have no idea what grade of steel they are) which seems to be a good temp cos it has done the trick to the shaft..however now i'm snapping the cup in half and have yet to find the correct temp here...too hard it snaps too soft and the slot wears
 
Last edited:
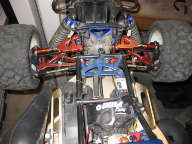
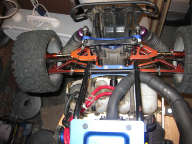
Put the shock limiters on with the alloy arms finally. Ah, spring is in the air. I hope to get out and run this thing soon!

IMG_8195.jpg

IMG_8194.jpg
 
Back
Top
AdBlock Detected

We get it, advertisements are annoying!

Sure, ad-blocking software does a great job at blocking ads, but it also blocks useful features of our website. For the best site experience please disable your AdBlocker.

I've Disabled AdBlock    No Thanks