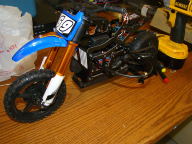
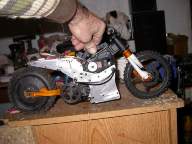
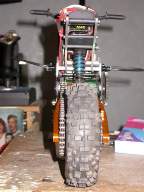
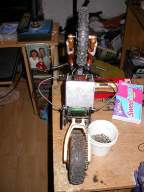
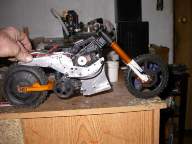
add another DX450 owner

This site may earn a commission from merchant affiliate
links, including eBay, Amazon, and others.
I finally fixed mine and learned I had killed a couple lipos. probably from smacking the ground doing those 25 footers (where I snapped the axle and frame. my stock tires is pretty much bald and it slips inside so it doesn't wheely very easy anymore. kinda works like a slipper though hehe.

I am a little worried about running on 3s. I hear some noises inside the back wheel, sounds like something is loose. I'll have to rip it apart again. my chain is also getting pretty sloppy. I think I will probably stick to 2s batteries from now

and Timmah, I have had castles in water lots. I live on the wet coast in the lower rainland ;)
 
cool. i know Castle doesn't mention anything about being Water Proof, or even Water Resistant for that matter, so its always in the back of my mind...

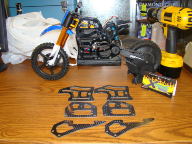
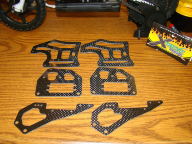
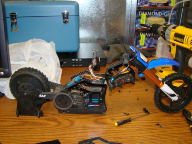
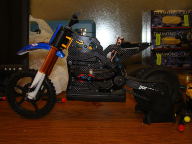
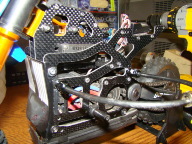
got the bike 1/2 apart. need to get some 3mm CF sheets so i can cut some new main chassis plates. Im Re Visiting the batty pack/COG mod/shift, with a new approach.
once i can get a bit of CF, and get the new chassis plates designed and cut out, i ll start a new thread.
 
I ran the motorcycle out in a field yesterday for the first time in quite awhile. After watching the suspension, I've realized the front oil filled shocks are worthless. I get no good movement out of them. Anyone think they are great and maybe give me some tips on setting them up better?

I'm seriously thinking about going back to the bouncy originals if I can't get these stupid things to work.
 
i found mine to be sticky and kind of stiff.

i went thru the and the last time used a lighter oil, though i don't recall what weight. they were less sticky and more functional. i just know i dropped weight from what they call for in the skimp directions. i want to say i was about 2, maybe 3 stepps lower than what is stock.

havnt used the bike in a while now. alot of stuff going on, and im still hanging to get come 3mm CF to build new side chassis plates, relocate some things, design and bulld a new lower battery box/bottom chassis cover plate, then i ll be able to run it again.
SO maybe late spring lol.

Mine is as well. I'll have to try some lighter oil before I chuck them I guess. I realized my little rider guy is starting to lose screws everywhere. Time to think about getting HPI atv rider somehow attached to the bike.

I plan on tearing mine down this winter as well. I love the abuse the thing takes, I just need longer run times and a better steering servo.
 
Last edited:
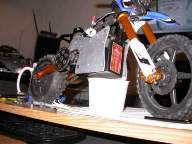
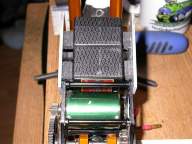
Hi guys, I just joined because of this awesome thread. Quick question- Do any of you have an issue with breaking the tail chassis plates from wheelies? I just broke my 3rd set (2 stock 1 carbon fiber) and I am trying to come up with a solution for it. maybe a CNC steel tail or some sort of steel bracing? Here are some pics of my chassis install. I do have a tail saver, but it was not installed in these pics. The CF chassis kit is cheapest at www.rcslot.com, but it's out of stock right now.

http://www.rcslot.com/pc-radio-cont...p://hobby.rcslot.com/search/index?query=dx450

DSC02502.jpg

DSC02503.jpg

DSC02504.jpg

DSC02505.jpg

DSC02506.jpg

DSC02507.jpg
 
ya i broke my first set (only one side) of the rear end chassis plates myself.

that when i decided to get some CF and revisit my project "loose that big ass battery box from the bottom) and gain some suspension clearance. part of this project wil be redoing the rear uppers in CF as well, and hopefully making less of an issue for the rear end braking like it has for a number of people.

no updates yet. still waiting to sort my finances to order the CF i need.
 
I only broke mine doing a 25 foot backflip at the bmx track. I screwed a chunk of delrin in between the rear chassis plates for wheelies. doubles as a skid plate. the alleven front fender saver bends. first alleven product I have gotten that I am not thrilled about

it was the delrin part smacking the ground though that broke the frame. it's pretty thin there.
 
I just got mine yesterday. Got it off ebay with upgrades for $160. Also found the carbon kit on the bay for $65 and went nuts at tower for all the carbon like parts. What the bike will have when complete:
Alum front shock upgrade - came on bike
alum suspension mount- came on bike
upgraded steering linkage - came on bike
alleven front bumper protector
alleven alloy body posts
xtreme racing black carbon frame kit
carbon look brake disks
carbon look front hub carrier
carbon look rear arm
carbon front rim
crabon rear rim
alleven rear wheelie bar
new driver figure
steel spur gear
16T pinion gear
optional street tires(going on old rims)

Installed one side of the carbon frame as well as most of the other parts except the rims. Will post pics when I am done.

Anyone have a link to a decent 5000mah lipo that drops in?
 
sadly I sold mine to a local 2 days ago. got bored being the only one to run it. it sucked in loose dirt so grass or hard pack was the only place to play, which meant going alone. I do rc to hang out, so Mark owns 2 and he'll get Joel to play... when they get really into them I might build another. I still like the arx or venom idea. sold mine for $100 cdn. talk about taking a beating LOL
 
I decided to go with G10 as it is much easier to work with and I can get it quickly. I got sick of breaking them during wheelies. They are not the prettiest thing, but I can spray them black or wrap them in 3M Dinoc Carbon fiber vinyl. I'll let you know how they hold up.

DSC02641.jpg

DSC02640.jpg

DSC02639.jpg
 
well i put the bike on the shelf for quite a while. had alot of thing to get done, get the home winter ready, work.. ect.....

so i have this week off, so i thought id re-visit my
Lose the battery box Mod.
heres where im at atm.

if all goes well with the design/fit, i ll have some made up out of CF.

again the goal is to lose the lower battery box, which will increase suspension travel by at least one inch of additional travel. im also working/hopeing this will help RE balance the bike. The Gyro system in the rear tire really makes the bike ass heavy, especially when airborn.

im hopeing by dong this mod, and setting it up the way i am, it will improve overall flight handleing, as well as normal driving charecteristics.

heres a couple quick pics.

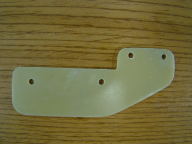
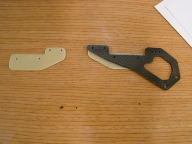
here is the stock plates
attachment.php


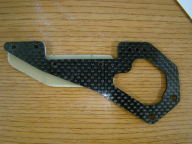
here is a pair of new plates
attachment.php


and here is a small comparrison between the stock and the new plates
attachment.php


once i have it all together and it is seemingly doing what it should, i plan to offer up a kit to upgrade the DX450/M5 bikes to a new, better setup.

ok, chassis plates are cut and matched nearly perfectly. couldnt help myself, i had to see how they fit up and how the pack sat in them. i must say, im Very happy with how it is. i can see one change i would like to make, and it can be done during the cf cutting. these 2 will work Great for testing out.

on with some pics
attachment.php

attachment.php

attachment.php

attachment.php

attachment.php

attachment.php

attachment.php

attachment.php


will be making new upper rear chassis plates tomorrow, providing im off that is.


got the rear uppers cut and installed. its basically ready to test run, but i have to make a bottom plate to hold the battery up. i ll be trying to make a piece for that tomorrow to use for testing (just to hold the battery from falling out.

attachment.php

attachment.php

attachment.php

attachment.php

attachment.php

attachment.php


today, i ll concentrate on the lower battery compartment lid.

Keep in mind, this is all for testing purposes only. I have another idea for makeing this a quick, simple, mod kit. I believe it will work Much better than this setup im working on, but i have to have one part CNCd for me, before i can give that setup a try. But if it works out like i believe it will, it ll be an Easy mod to install/use, will make swapping battery packs easier, as well as offer the improvments in handleing i think it will make.

now i just need to find someone local with a CNC that can make the part i need.
 
ok, got a bottom plate cut and installed. should work to test things out.

now i only need to get a Lipo charger, and atleast one more saddle pack so i can test the ease of battery swaps ect. then ofcourse how it handles.
attachment.php

attachment.php

attachment.php
 
waiting for HK USA ware house to get some stock in before i can order a charger and a few spare battery packs.

while messing around today, i decided to do another mod i have been meaning to do. which is drill a new hole for the steering tree king pin. i moved it back about 3.5 to 4mm, which pushed the front forks forward from the main bike that much farter. not sure how this is going to handle, but will find out before too long.

i also re did the front shocks with 20w fork oil. i used actual Bel Ray Fork Oil for motorcross bikes. i had 40w in, or maybe 50w, and it was too much. i don't have any 30w yet, but i do have some on order from the local motorcross shop.
 
well i had to make another set of rear upper plates. I still need a new lipo charger, but other than a pair of 4mm to dean connector to hook the battery to the esc, im ready to test out the new setup.

these are only test pieces to see the concept will work the way i want it to, and the effects will be what i expect. final pieces of the chassis plates will be made form CF to put the COG lower again. as well as the bottom plate will be a cnc'd piece of billet aluminum. it will be a battery holder with lid to make battery swaps easy. the lid will double as a skid plate and the box around the lid will be support for the bottom part of the main chassis plates. i am contemplating moving the main chassis plates to the INside of the motor mount plates to thin the profine a bit more. the stock setup has them on the outside. this wil require new cross support bars as they will need to be a bit shorter in front if i do it.

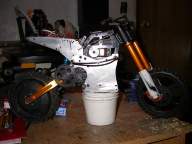
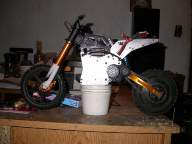
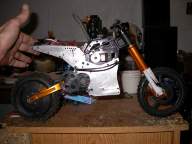
here are some pics i took today to show you a general idea of the setup. once i can get some testing done, i ll move on to getting a set of CF rear plates make up and the new cnc'd battery box. the main chassis plates made of cf can be stock type. the battery box will allow for the needed room on the bottom to allow the saddle packs to fit.

picture.jpg
picture.jpg
picture.jpg
picture.jpg
picture.jpg
picture.jpg


and if you wanted to get really creative, you could make a Chopper
picture.jpg


you can see the saddle packs fit very nicely in this spot. i have a few pieces of self aheasive foam for padding between the battery pack and the chassis plates. the battery is nice and snug, but yet comes out and goes in easy.

if you look closely, you can see the bottom plate on this mockup piece is hinged. i also made new rear chassis mount spacers to get the rear part of the bike a bit wider. this allowed me to fit the MM esc behind the shock area. once done, i ll have a full low fender and will have the ESC in a balloon to keep it dry.

picture.jpg
picture.jpg


more later

more later
 
Last edited:
Back
Top
AdBlock Detected

We get it, advertisements are annoying!

Sure, ad-blocking software does a great job at blocking ads, but it also blocks useful features of our website. For the best site experience please disable your AdBlocker.

I've Disabled AdBlock    No Thanks