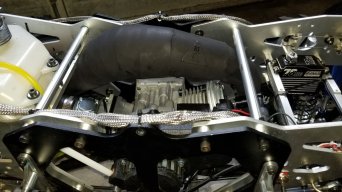
Joined the Raminator Owner's CLub as of Yesterday.

This site may earn a commission from merchant affiliate
links, including eBay, Amazon, and others.
If you are thinking about maybe getting the upgraded GP46 engine in the future that primal sells I will tell you now that the bartalone pipe will not work with that engine
I asked Dan if it would work and he checked it out and said it will not unless I had a custom header made for it
 
I bought the Bart pipe to go with a TMR engine. :D 
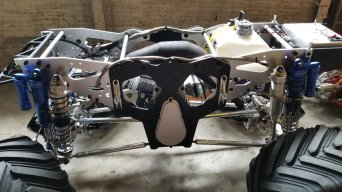
I took the risk on this. I am sure I can make it work.

I worked out a deal with someone who had a TMR engine available that was unused. Not sure if it is a V1 or V2. I did not realize there were two versions until after I got the engine.

I did the continuity check from spark plug to engine case (side with the ignition coil) and could not get less than 15 Mega ohms. That makes for a poor ground for the spark energy to return to the coil. May as well be an open circuit. Considering the thickness of the anodizing on the cylinder caps, it is surprising the engines will actually run. Electrical energy will find a path to discharge too. For a good spark and no miss-fires, you need good ground circuit otherwise the high voltage discharge may seek a different path with least resistance or result in a breakdown of the coil windings as they are only coated with varnish. I doubt we are dealing with anything more than 17KV to 25KV.

I decided to remove the cylinder head from the engine to make a change. Thought about just wet sanding the contact surfaces. The only insulator that would be left would be the cylinder gasket on the bottom end. Copper gasket would work, but not sure where to find such. Decided to eliminate the anodizing on both insert and heat sink. This will couple the insert to the heat sink electrically as the anodizing is a better insulator than conductor. The final coupling of the top of the cylinder to the engine case would then be the head bolts. I did try using the purple power cleaner, that removed most of the anodizing except for a few stubborn areas. If the acid was a bit stronger it would have removed all of the anodizing.
How about sodium hydroxide? Sure, caustic soda was not something to try in the home. That is some nasty stuff. There is liquid plumber, easy-off oven cleaner, or nair hair remover (weakest concentration). Liquid plumber was questionable. Nair, hell no, that would probably take forever to remove any anodizing. Easy-off oven cleaner was the available option (stuff in the yellow can). Mind you that the aluminum will not look shiney after removing the anodizing. It will still have a haze of light oxides and some dark discolored areas. Just make sure you wash off the chemicals. Oh yeah, this stuff will react with aluminum and it will get hot so play it safe and use a ceramic bowl. Do not use metal or plastic. I also had to wet sand the contact surfaces of the inner cap. Here is the end result of 10 minutes in the lye or sodium hydroxide. The stock assembly is on the left and the TMR is on the right. They are the same parts. 20220827_180743.jpg

Since the lower cylinder gasket was not stuck to the cylinder, it was easy to slip it off. Stock Raminator cylinder on the left, TMR cylinder on the right. The stock Raminator cylinder was stuck to the gasket. I broke that engine just by removing the head screws as one of the cast aluminum threaded bosses on the clutch side split into two. I believe this was due to the screw length and the end of the screw digging into the one case bolt just below the boss. End of the screw was totally deformed so it was inevitable the boss would split when removing the screw.
20220827_180916.jpg

The TMR cylinder has the same casting numbers as the Primal stocker. However, the cylinder was ported like a stage-3 version (what it is supposed to look like). The other difference was the exhaust port. It was opened up. Sorry I did not think if taking a picture of the exhaust ports. The picture above you can see the shiny reflection in the exhaust port of the TMR engine whereas the original is more of a dark grey color. Sure, the raw aluminum head looks plain Jane compared to the anodized part. Who sees the interior of the engine anyway? I would rather have a good solid ground to complete the spark circuit. Some close up views of the two cylinders.

Stock.
20220827_180926.jpg

TMR:

20220827_180922.jpg

And a few more.
20220827_181014.jpg

Don't worry, the piston was only out in the open for a short period. Re-assembled as soon as the parts were cleaned and dry.
Ran another continuity test. Stock engine: 30 Meg measured from spark plug hex to coil ground. Modified TMR 0.1 ohms from spark plug hex to coil ground. Coil ground the magnetic coupler plates that are secured with the two strews to hold the coil to the case. I also swapped the primary coil wire that connects to the kill switch. I thought the oversized o-ring connector was too large. The stock one was of proper size. Also had a red insulation. Now I have plenty of spare parts. I was going to jump on the Taylor RC GT50, but the deal was too hard to let go on the TMR. Also, I was not looking for that much power, just a performance improvement over stock.

20220828_074359.jpg
I will get pictures of the Bartolone pipe once I get into the process of swapping out the engine in the Raminator.

I guess I will not find out if the carbon fiber reeds will do much for the stock engine.
I am also considering removal of the transmission to do a complete check, good opportunity to change gears. It seems to have issues getting out of reverse once you put it in reverse. Need to check for both springs and suitable lubrication. May have to add a cable lock to the other side of the shift fork and one to the servo so the cable itself can supply some force to move the fork.

Just curious if anyone has thought about changing the chain sprockets. Probably easier said than done.
 
Before I get the new pipe and engine installed, I wanted to address the issue I am having with the transmission.
  • I can get the transmission into reverse easy.
  • Getting it out of reverse can be a struggle.
Other than that, I have no problems with the Raminator with the exception of the exhaust spitting oil all over everything. Hopefully that will change with the new exhaust pipe.

Just to be different with this vehicle, I decided to clean up the welds as it seems there was some oxides that were flaking off of the steel in some areas. I doubt that is an issue. I have seen similar with two pipes I got for use on a Kraken KV5TT: Taylor RC pipe and a Victory pipe. Unfortunate that I have not addressed those pipes before use as they are now getting rusty. I did consider using header paint /ceramic coating but opted not to do so. It should not take much effort to clean the Taylor pipe and get a few coats of header paint on it.

Bart pipe was all sanded down, washed down with degreaser, and coated with primer and flat black paint. I may do the heating trick using a box before I mount it to the Raminator. Sorry, no pictures of the pipe just yet.

Now for the transmission. I believe Owen had mentioned that it is possible that there is only one spring in the transmission. That may explain why I can get it into reverse but then it gets stuck in reverse. Not enough spring force assumed. Well, I found out the reason there is this issue. Yeah, one spring, not much of a problem. However, only one guide pin, that is an issue.

20220903_121951.jpg

20220903_121954.jpg

I was prepared ahead of time. Ordered the rods and springs assuming there was something missing.
Also ordered the some forward/reverse and pinion gear with the spiral cut. New shift fork, shaft, and synchronizer (could have sworn it was in-stock when I placed the order, apparently not). Since I was not certain what the issue was, wanted the parts before I tore the transmission down. I do not mind having spares.

20220903_202100.jpg

Ran all of the parts in some degreaser. Had to wash the parts with water. Should have tried to remove the bearings on the forward/reverse gears before cleaning. Did what I could with compressed air to get as much water out of the bearings as they were not sealed. Put everything on a small cookie sheet and baked it in a toaster oven at 250°F. While the parts will still hot, I flooded them with Lucase oil assembly lube. Saturated the bearings a few times. That assembly lube is almost like the sticky Detroit Performance grease as it clings to the parts well. May have to toss the toaster as it is now contaminated. Not good practice if it is used for preparing food.

The new gear set will be placed in storage as the spiral cut and pitch does not match the stock gears. The stock gear cuts are a bit beefier. If I end up grinding them down or breaking some teeth off, I have a matched set with confirmed mesh to use. The replacement parts do not have the same cut as the stock V3 gears so they will not mesh properly. Just wanted to point that out. If you need to replace one, do not forget the pinion.


20220903_202331.jpg

20220903_202429.jpg

Time to go assemble the transmission. Will be using the 23/27 gears, using the larger of the two for the pinon, in hopes of a little more speed. Not tempted to use the 20/30 gear set yet.

So those with the Taylor engines (GT50, 71 or 80) what gears did you go with? Just curious. I do not have one of those yet. I think what turned me off was all of the video I have seen with the alternate engines is nothing but wheelies. Any means to fix that issue without breaking parts? I had wondered if using the other gears in a reducer mode or creeper arrangement would help. 20 pinion/30 spur? Or will it not matter regardless of gear ratio choice?
 
Before I get the new pipe and engine installed, I wanted to address the issue I am having with the transmission.
  • I can get the transmission into reverse easy.
  • Getting it out of reverse can be a struggle.
Other than that, I have no problems with the Raminator with the exception of the exhaust spitting oil all over everything. Hopefully that will change with the new exhaust pipe.

Just to be different with this vehicle, I decided to clean up the welds as it seems there was some oxides that were flaking off of the steel in some areas. I doubt that is an issue. I have seen similar with two pipes I got for use on a Kraken KV5TT: Taylor RC pipe and a Victory pipe. Unfortunate that I have not addressed those pipes before use as they are now getting rusty. I did consider using header paint /ceramic coating but opted not to do so. It should not take much effort to clean the Taylor pipe and get a few coats of header paint on it.

Bart pipe was all sanded down, washed down with degreaser, and coated with primer and flat black paint. I may do the heating trick using a box before I mount it to the Raminator. Sorry, no pictures of the pipe just yet.

Now for the transmission. I believe Owen had mentioned that it is possible that there is only one spring in the transmission. That may explain why I can get it into reverse but then it gets stuck in reverse. Not enough spring force assumed. Well, I found out the reason there is this issue. Yeah, one spring, not much of a problem. However, only one guide pin, that is an issue.

View attachment 83448

View attachment 83449

I was prepared ahead of time. Ordered the rods and springs assuming there was something missing.
Also ordered the some forward/reverse and pinion gear with the spiral cut. New shift fork, shaft, and synchronizer (could have sworn it was in-stock when I placed the order, apparently not). Since I was not certain what the issue was, wanted the parts before I tore the transmission down. I do not mind having spares.

View attachment 83450

Ran all of the parts in some degreaser. Had to wash the parts with water. Should have tried to remove the bearings on the forward/reverse gears before cleaning. Did what I could with compressed air to get as much water out of the bearings as they were not sealed. Put everything on a small cookie sheet and baked it in a toaster oven at 250°F. While the parts will still hot, I flooded them with Lucase oil assembly lube. Saturated the bearings a few times. That assembly lube is almost like the sticky Detroit Performance grease as it clings to the parts well. May have to toss the toaster as it is now contaminated. Not good practice if it is used for preparing food.

The new gear set will be placed in storage as the spiral cut and pitch does not match the stock gears. The stock gear cuts are a bit beefier. If I end up grinding them down or breaking some teeth off, I have a matched set with confirmed mesh to use. The replacement parts do not have the same cut as the stock V3 gears so they will not mesh properly. Just wanted to point that out. If you need to replace one, do not forget the pinion.


View attachment 83451

View attachment 83452

Time to go assemble the transmission. Will be using the 23/27 gears, using the larger of the two for the pinon, in hopes of a little more speed. Not tempted to use the 20/30 gear set yet.

So those with the Taylor engines (GT50, 71 or 80) what gears did you go with? Just curious. I do not have one of those yet. I think what turned me off was all of the video I have seen with the alternate engines is nothing but wheelies. Any means to fix that issue without breaking parts? I had wondered if using the other gears in a reducer mode or creeper arrangement would help. 20 pinion/30 spur? Or will it not matter regardless of gear ratio choice?
I opened mine up and found i broke the forward reverse shaft, and i was also missing a pin and spring for the shift fork. I upgraded all three shafts to titanium.
 
I opened mine up and found i broke the forward reverse shaft, and i was also missing a pin and spring for the shift fork. I upgraded all three shafts to titanium.
V3 or other version? out of curiosity. Good to know that there are alternate materials available. However, I could not find the titanium forward/reverse shaft. I see Taylor RC has the other two shafts.
 
V3 or other version? out of curiosity. Good to know that there are alternate materials available. However, I could not find the titanium forward/reverse shaft. I see Taylor RC has the other two shafts.

V3 or other version? out of curiosity. Good to know that there are alternate materials available. However, I could not find the titanium forward/reverse shaft. I see Taylor RC has the other two shafts.
Mines a v2. I emailed taylor about the forward/reverse shaft and they have had them in testing for a little while with good results. They haven't been available to the public but he was able to sell me one. If you go that route you must update to the v3 synchronizer also (v3 is cut for hex shaft v2 is cut for splines)
 
Mines a v2. I emailed taylor about the forward/reverse shaft and they have had them in testing for a little while with good results. They haven't been available to the public but he was able to sell me one. If you go that route you must update to the v3 synchronizer also (v3 is cut for hex shaft v2 is cut for splines)
My Ram is a V3. But good to know there will be options from Taylor RC in alternate materials such as titanium alloys. (y)
So far, I have the fuel tank, exhaust, transmission and engine removed. Well damn, the barbs on the carb are for keeps, had to cut the fuel lines off since they would not slip off. No big deal since I am replacing the fuel lines anyway.

So far, the only hang up is removing the engine bracket. Spent lots of time with 1600°F setting on the heat gun on the screws. Had to give up last night. Today I will remove the fan cover and heat from the inside of the case as I found the threaded bosses in the casting are cut through and not a blind hole. Besides that, I would prefer not to melt the pull start components. Was considering using the black fan cover and pull start vs the red one that is on the replacement engine. Nothing wrong with the stock engine, just wanted to make that clear. It works great. Just wanted a bit more power.
 
Last edited:
Before I get the new pipe and engine installed, I wanted to address the issue I am having with the transmission.
  • I can get the transmission into reverse easy.
  • Getting it out of reverse can be a struggle.
Other than that, I have no problems with the Raminator with the exception of the exhaust spitting oil all over everything. Hopefully that will change with the new exhaust pipe.

Just to be different with this vehicle, I decided to clean up the welds as it seems there was some oxides that were flaking off of the steel in some areas. I doubt that is an issue. I have seen similar with two pipes I got for use on a Kraken KV5TT: Taylor RC pipe and a Victory pipe. Unfortunate that I have not addressed those pipes before use as they are now getting rusty. I did consider using header paint /ceramic coating but opted not to do so. It should not take much effort to clean the Taylor pipe and get a few coats of header paint on it.

Bart pipe was all sanded down, washed down with degreaser, and coated with primer and flat black paint. I may do the heating trick using a box before I mount it to the Raminator. Sorry, no pictures of the pipe just yet.

Now for the transmission. I believe Owen had mentioned that it is possible that there is only one spring in the transmission. That may explain why I can get it into reverse but then it gets stuck in reverse. Not enough spring force assumed. Well, I found out the reason there is this issue. Yeah, one spring, not much of a problem. However, only one guide pin, that is an issue.

View attachment 83448

View attachment 83449

I was prepared ahead of time. Ordered the rods and springs assuming there was something missing.
Also ordered the some forward/reverse and pinion gear with the spiral cut. New shift fork, shaft, and synchronizer (could have sworn it was in-stock when I placed the order, apparently not). Since I was not certain what the issue was, wanted the parts before I tore the transmission down. I do not mind having spares.

View attachment 83450

Ran all of the parts in some degreaser. Had to wash the parts with water. Should have tried to remove the bearings on the forward/reverse gears before cleaning. Did what I could with compressed air to get as much water out of the bearings as they were not sealed. Put everything on a small cookie sheet and baked it in a toaster oven at 250°F. While the parts will still hot, I flooded them with Lucase oil assembly lube. Saturated the bearings a few times. That assembly lube is almost like the sticky Detroit Performance grease as it clings to the parts well. May have to toss the toaster as it is now contaminated. Not good practice if it is used for preparing food.

The new gear set will be placed in storage as the spiral cut and pitch does not match the stock gears. The stock gear cuts are a bit beefier. If I end up grinding them down or breaking some teeth off, I have a matched set with confirmed mesh to use. The replacement parts do not have the same cut as the stock V3 gears so they will not mesh properly. Just wanted to point that out. If you need to replace one, do not forget the pinion.


View attachment 83451

View attachment 83452

Time to go assemble the transmission. Will be using the 23/27 gears, using the larger of the two for the pinon, in hopes of a little more speed. Not tempted to use the 20/30 gear set yet.

So those with the Taylor engines (GT50, 71 or 80) what gears did you go with? Just curious. I do not have one of those yet. I think what turned me off was all of the video I have seen with the alternate engines is nothing but wheelies. Any means to fix that issue without breaking parts? I had wondered if using the other gears in a reducer mode or creeper arrangement would help. 20 pinion/30 spur? Or will it not matter regardless of gear ratio choice?

Nice use of a toaster oven! The reverse springs are an issue we let the manufacturer know about. Sometimes if the truck doesn't want to shift, it just needs to be rolled back and forth slightly for the dogs to engage. This is sometimes even the case with a properly assembled transmission.

~ Owen
 
Nice use of a toaster oven! The reverse springs are an issue we let the manufacturer know about. Sometimes if the truck doesn't want to shift, it just needs to be rolled back and forth slightly for the dogs to engage. This is sometimes even the case with a properly assembled transmission.

~ Owen
I believe this will now work better than before. The slide holes on the shift fork need to be drilled out with a 4.2mm drill. Otherwise, the holes are way too tight. The shift fork in the transmission had the one hole drilled out to start with at that diameter. The other one was not. Assembly appears to work properly when pulling on the cable by hand. I did consider adding one of the springs to the cable for a total of three springs, but that was too much spring tension. Two springs are all that is needed. I will find out soon enough how the 2nd spring in the assembly will work out. Still have more stuff to do before I can fire the engine up. I was going to stick with the stock engine but since I had the truck apart, it was a good opportunity to install the alternate engine. Thanks again Owen for all of your help.
 
The engine swap took longer than expected. Since I elected to rebuild the transmission first it added to the timeline. Since the transmission was out of the Ram, it was the opportunity to remove the stock engine. I will keep it as a spare and will have other spare parts I can pull from the other engine I bought if needed.

Installing the TMR engine was not too difficult, just as easy to install as it was to remove the original power plant. What added to the turn-around time was prepping the Bartolone pipe for ceramic coating. Will see how the header paint will work out. Have not started the engine yet. Waiting for the battery to charge up.
20220909_100819.jpg
20220909_100925.jpg
20220909_101011.jpg
I wanted to keep things stock looking. Reused the fan cover and pull start from the original engine. I guess the red cover would have been ok.

The Bart pipe was a tight fit. I had a few clearance issues to overcome with the TMR engine. This would not be an issue with the stock engine.
  • Clearance for the high needle screw as it has a staked pin. Not much rotation without touching the exhaust pipe. I did consider cutting a groove on the end of the screw and remove the pin, or at least cut the pin to make it shorter. I may do that eventually. At least I checked to confirm it is set for break in.
  • Clearance for the square shaped fuel tank support rod. Had to get the rubber exhaust hanger in the right place. I did have to grind off some metal to get a small air space between the rod and exhaust pipe. Also had the first clearance concern which was more of a priority.
As for the stock engine and carb, there will be no issues with clearance since the high needle screw is on the other side and the intake runner does not raise the carb closer to the exhaust. Still puzzled as to what the two plates that came with the Bart pipe are used for. I assume that is for use as an offset or make-shift shackle for mounting the exhaust. Have no clue as there are no instructions or any mention of what they are used for. Images on the Primal website for the exhaust did not make use of the mentioned hardware. For me it was easier to just drill a new hole for the exhaust hanger.

There is one thing to note on the Bart pipe. The stop ring on the header is not completely sealed. At least mine was that way. I would have assumed a braised or completed weld around the stop ring would prevent combustion byproducts from leaking out. The rubber hose will not prevent that if there is space between the stop ring and header pipe. My fix was to seal it off with some high temp RTV sealant. Also used it to lubricate the exhaust pipe to get the rubber hose back on. This will also create a seal on the union of the header and exhaust pipe. Also had to wait a few days to allow it to cure.

For the stock engine, one would be basically done. Since I opted for the TMR, a few things were attempted. Relocating the rear sway bar just enough so it is not cutting the air filter in half.

The following is not required for the stock engine:

I used the sway bar bracket as a drill guide to create a pilot divot with a small sized drill paying attention not to damage the threads on the part. Easy to do, install the bracket inverted (screws on the inside) using the one hole. I did check for sway bar clearance to the shock spring first. Was not going to work out unless I move the spring to the other shock. Good to know the Outerwears cover made for the RamAir race filter will fit on the stock filter if you remove the outer foam layer. I should have taken the time to clean this vehicle thoroughly. I will do that soon enough.
20220909_101057.jpg

I was going to use the plastic spacers to raise the tank. However, I opted for some aluminum spacers from McMaster-Carr. I got a few different sizes, two sets in inches and two sets in metric. The best fit was the 30mm spacer for a 5mm bolt. Will have to be careful when running the Ram without the body as the tank fuel cap is the highest point. I do not need the vented fuel cap anymore but have not had any issue with fuel dumping on a roll over with this filler cap (used the rubber nipple from a standard filler cap but without the plastic insert with the vent seal). If you want more details on that I can take some pictures if needed. I will not use the flip top to refuel since the rubber nipple only has a small hole and I tend to be impatient at times. 20220909_100737.jpg

During the reassembly, was the perfect time to upgrade the body mounts.

I should have this thing fired up after lunch today. :D Not sure what to expect at this point. Hopefully all will be good.
 

Attachments

  • 20220909_101023.jpg
    20220909_101023.jpg
    163.6 KB · Views: 9
  • 20220909_100838.jpg
    20220909_100838.jpg
    177.9 KB · Views: 9
Sort of had an issue getting the fuel to prime. Turns out the Full-Force RC V2 high flow fuel line kit was a no flow setup. :cry: I only need one fuel line to the carb and the return line is not used with the TMR setup. At least there were two brass fittings in the kit. The first one I used was plugged. Checked the second on in the kit and that was good.

Had some fun trying to prime the engine after the fuel line was corrected. :D I did have enough oil in the engine to lubricate the rings and bearings when I reassembled it (just a few drops of oil). It did take some effort to get the fuel into the engine, and once that occurred, I got it to fire up briefly. This exhaust is going to be loud. :unsure: Had to make adjustments to the throttle stop (some call it the idle speed control screw, same thing).
Fired right up, and surprised it was on one rotation of the engine (about 2 to 3 inches of pull).

Yep. The Bartolone exhaust is loud. Not sure how loud it would be with the stock engine. The stock engine and exhaust is more on the timid side in sound level.

Forward and reverse shifting worked without issue.(y) No longer getting stuck in reverse like it was with the one spring and rod.

Now for my choice in gears. Decided to try the 27/23 gear ratio. :confused: Perhaps it is due to a new engine and needs to be broken in. Considering changing back to the 25/25 ratio.

The 2-shoe clutch seems to need almost full throttle to get it to engage. Since I will have to pull the engine to adjust the tension on the springs, may just opt to install the stock 3-shoe clutch. I will practice some patience before I decide to pull the engine to make a clutch adjustment or swap. Things were improving near the end of the first run (20 minutes of run time). Will do the gear swap first.
 
those adjustable 2 shoe clutches that TMR used are not very good as they have poor contact area with the clutch bell
they start slipping and then burn out
the problem with the stock clutch is it engages too quickly thus sacrificing bottom end
What i did with my engine was i bought a cheap non adjustable 2 shoe clutch off e bay for like 20 bucks and it has been working good, it engages higher rpm then the stock clutch and has good contact area on the bell
As far as the gear ratio goes you pretty much need a taylor engine to run the taller gears the stock and TMR just don't got the oomph
I tried the 27/23 with the mega truck tires/wheels and it wasn't too bad but i still liked the 25/25 better
I run the 25/25 ratio on the ram with the taylor 50 too and have no complaints other then the constant wheelies lol
 
I figured the clutch on the TMR engine was not all that great. Just looking at the surface area, it is not as much as the stock clutch. Ran another heat cycle with the engine, this time I wanted to see if there was any pull under throttle. Nope. It did not take much effort to keep the Ram stationary with one hand at full throttle. Wheels did not even spin. Looks like I need to take it apart again to replace the clutch. This would be the time to shorten the pin on the high flow needle. I got the smallest pully-puller from Autozone. I did try the tap and pry method first, but that did not have any good results. Removed the clutch in 15 seconds from the donor engine with the pully-puller. I will keep the original engine in its original form but may change the reeds if I decide to use it again. I am not sure what the RPM range is on the TMR, I assume it would be similar to the stocker. I never had any issues with the 3-shoe clutch. I do not mind the lower engagement of the stock clutch. Will see how it works with the TMR. I was looking for alternatives like Deathrawt mentioned. Metal shoe clutch like the FS type would be nice. Have not found one yet. As for the pully-puller, the claws can be reversed as shown.

20220912_063034.jpg
 
I have the same style puller and yup it works good to remove the stock clutch
I was considering grinding down on the three hooks for a better fit. The steel is a bit on the wide side to get it into position. A slight reduction in width in a few areas would not compromise the tool.
 
No pictures for this post.
Was able to get the TMR out of the Raminator to swap the clutch. I also shortened the length of the roll pin that is on the high needle screw. While the engine was out, installed the 25/25 gears, and then reassembled everything. It only took a few hours since I was working on the garage floor. I do not have any work stands that I could use for this truck. Have not fired it up yet since I had other obligations to attend too.
 
Hello, just got the ROCKSTAR ram v3 and looking at fixing possible weaknesses before first fire up? can anyone explain the brass bushing between pinion bearings? and what or how to get these/ make them?
also ordered a 49cc engine off ebay to make alittle more power for bashing, plan on building it like " alden cost" explains on you tube" raise cylinder base .070 and machine top off .090.. anyone running this? any more good tips with this engine set up?
 
I had noticed the pinion shaft is on the loose side in the axles. The rear has more movement than the front.
I was going to ask the same question on the bushing. Thanks for the link RickDizzle.

Froghunter, not sure what engine you are looking at on ebay.
Hello, just got the ROCKSTAR ram v3 and looking at fixing possible weaknesses before first fire up? can anyone explain the brass bushing between pinion bearings? and what or how to get these/ make them?
also ordered a 49cc engine off ebay to make alittle more power for bashing, plan on building it like " alden cost" explains on you tube" raise cylinder base .070 and machine top off .090.. anyone running this? any more good tips with this engine set up?
I saw the set of videos on that. Interesting. Considered doing something similar but opted to get a different engine (TMR).

The only thing I can suggest is to remove the anodizing on the cylinder caps (inner part that holds the spark plug and outer cap that holds the cylinder in place). This will improve performance as it greatly reduces the miss-fire and weak spark problems. You may need to wet sand the flat surfaces on the inner cap with some fine sandpaper (helps to remove any residual aluminum oxide left over from the anodizing process.)
 
Back
Top
AdBlock Detected

We get it, advertisements are annoying!

Sure, ad-blocking software does a great job at blocking ads, but it also blocks useful features of our website. For the best site experience please disable your AdBlocker.

I've Disabled AdBlock    No Thanks