DBXL Tear the ole girl down

This site may earn a commission from merchant affiliate
links, including eBay, Amazon, and others.
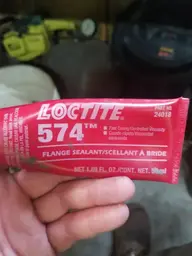
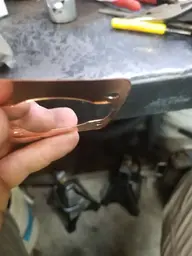
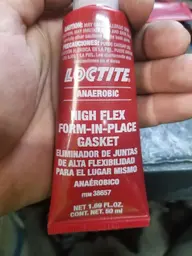
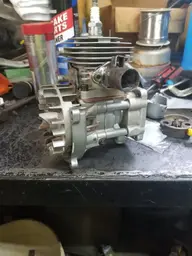
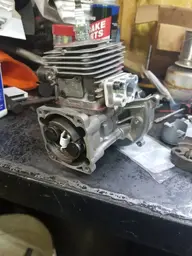
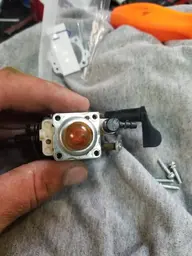
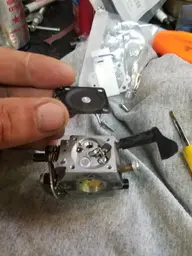
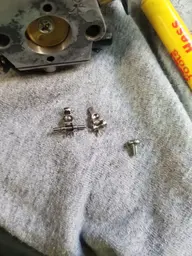
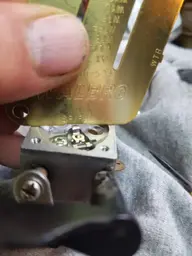
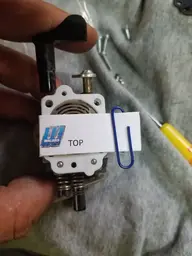
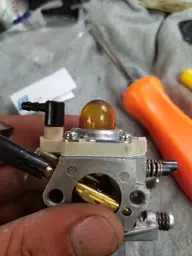
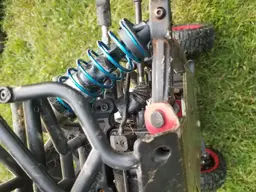
Turns out I lied.... got her more or less back in long block form. Had a little time before we have to leave again. So I didnt take loads of pics. Sorry. Few things though. I used two different loctite sealants on the gasket areas. 574 was applied to the intake and exhaust gaskets. Should help to seal them up a bit. And i use 38657 around the base gasket. It's a high flex form a gasket but it's really thin and its anaerobic. It does a great job of sealing minor imperfections. don't forget to trin the case gasket off flush with the deck area. I used the graphite steel gasket as I feel they do a better job then paper gaskets. In this case a small file was used to get it down flush. Be very careful not to take any material off the deck! I was rather surprised with the DDM alloy manifold. I barely had to take anything off to match up to how I modded the intake. I ended up with 0.022" squish which is ok by me would have liked 0.020" but there are limited gaskets available and I don't have access to a lathe right now to turn the jug down. I also said screw the piston mods. don't have another 3 odd hours to toss into it again. Really missing being able to run it and I still have a good bit to do.
 

Attachments

  • 20190720_150802.jpg
    20190720_150802.jpg
    83.4 KB · Views: 5
  • 20190720_152747.jpg
    20190720_152747.jpg
    71 KB · Views: 5
  • 20190720_153734.jpg
    20190720_153734.jpg
    105.4 KB · Views: 5
  • 20190720_155046.jpg
    20190720_155046.jpg
    117 KB · Views: 6
  • 20190720_155039.jpg
    20190720_155039.jpg
    127 KB · Views: 5
UPDATE TIME ? my wife had the kids at Hershey park so, after work, I had the house to my self for a few hours. I got her more or less back together! Tank, engine, shocks and new air filter set up. I'm stoked! I did run in to one small snafu. With the new fid tranny mount I cant get my killer bee battery cover back on ? didnt have time to mess with it tonight. Another point of annoyance is having to take the brake levers off to get the lid on the old mount set up. Think I'll be bending the linkage to clear it after I figure out what's up with the trans mount. I took a few pics of the walbro spiral diaphragm installation in my carb. Remove the primer and housing. Remove your old diaphragm toss it in the trash. You wont be needing it any more. Remove the needle lever. Toss it too. The new one is on the left old one on the right. The new one sits much higher. Use the handy gauge that comes with the kit to set you lever height. I had to bend the lever up just a tiny bit. Place your new diaphragm on and reassemble loosely. Remove the paper clip and slide the paper retainer out from in between the housing. Tighten the screws back up. Enjoy your new improved carb ?
 

Attachments

  • 20190725_210110.jpg
    20190725_210110.jpg
    133.3 KB · Views: 12
  • 20190725_210110.jpg
    20190725_210110.jpg
    133.3 KB · Views: 13
  • 20190725_210104.jpg
    20190725_210104.jpg
    229.7 KB · Views: 13
  • 20190725_171220.jpg
    20190725_171220.jpg
    132.7 KB · Views: 12
  • 20190725_171351.jpg
    20190725_171351.jpg
    123.3 KB · Views: 12
  • 20190725_171533.jpg
    20190725_171533.jpg
    128.4 KB · Views: 10
  • 20190725_171644.jpg
    20190725_171644.jpg
    218.7 KB · Views: 11
  • 20190725_171855.jpg
    20190725_171855.jpg
    94.5 KB · Views: 11
  • 20190725_172153.jpg
    20190725_172153.jpg
    92.6 KB · Views: 12
  • 20190725_172406.jpg
    20190725_172406.jpg
    99.3 KB · Views: 12
I was watching a botajell vid a wile back and he raved about how much better his carb worked with it. And how its impervious to ethonal so that sold me. I'll get the linkage and tray sorted out tomorrow bit of grinding and bending and I'll have it working like a charm
 
I was watching a botajell vid a wile back and he raved about how much better his carb worked with it. And how its impervious to ethonal so that sold me. I'll get the linkage and tray sorted out tomorrow bit of grinding and bending and I'll have it working like a charm

Also watch that vid? as i don't hqve ethanol in my gas here not realy worried? but report back if it improves performance im in?
 
Been a bit since I updated anything. Got close to 2 gallons through the engine now. My uncle was over for supper, and we were watching Bob's vid. Uncle said that's crazy sounds like a dirt bike I'd love to see one in person. Walked in the house and grabbed the ole girl. Got 2 tanks into it then fought a T post with the back right tire, stripped the bolt out that hold the hinge pin keeper in.... all good, stuck a drywall screw in to finish the tank out. No vid, here's a few pics for your entertainment. Feking front sway bar links both busted again as well as, the servo saver loosened up a bit.
Neighbor wanted me to run it down the lane, started git about half throttle and it ran out of fuel ?. Told him that was it for the night.
 

Attachments

  • 20200906_182546.jpg
    20200906_182546.jpg
    208.4 KB · Views: 12
  • 20200906_183457.jpg
    20200906_183457.jpg
    332.5 KB · Views: 12
  • 20200906_182557.jpg
    20200906_182557.jpg
    130.9 KB · Views: 12
  • 20200906_182552.jpg
    20200906_182552.jpg
    214.3 KB · Views: 11
  • 20200906_190022.jpg
    20200906_190022.jpg
    150.3 KB · Views: 11
  • 20200906_190025.jpg
    20200906_190025.jpg
    130.4 KB · Views: 11
Back
Top
AdBlock Detected

We get it, advertisements are annoying!

Sure, ad-blocking software does a great job at blocking ads, but it also blocks useful features of our website. For the best site experience please disable your AdBlocker.

I've Disabled AdBlock    No Thanks