looking good paul!
")


Follow along with the video below to see how to install our site as a web app on your home screen.
Note: This feature may not be available in some browsers.
 It shows you have done lots of this


All jokes aside good jobso i did what sean suggested and fitted cage and bonnet and pipe
also looked at seans build thread to see where he placed his antenna on the haric box,
have a rough idea now, but needs to be as far forward as possible cos the plan is to change the engine up in the future and pipe will be bigger ,
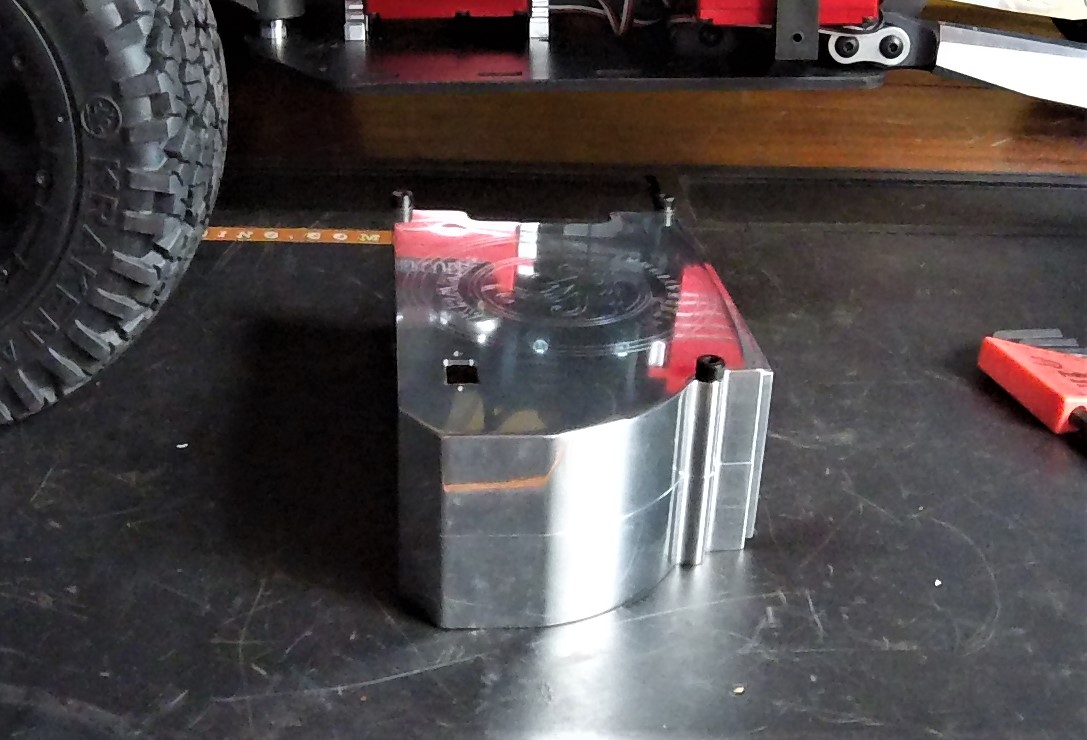
then got sidetracked from drilling the holes needed and started sanding and polishing
haric said sand and polish, so spent the afternoon sanding to get most of the machine marks out on the sides etc,
top of box after first polish,
top section just placed on top of bottom section,
first polish versus just sanded/smoothed,

 It shows you have done lots of this
 All jokes aside good jobso i did what sean suggested and fitted cage and bonnet and pipe
also looked at seans build thread to see where he placed his antenna on the haric box,
have a rough idea now, but needs to be as far forward as possible cos the plan is to change the engine up in the future and pipe will be bigger ,
then got sidetracked from drilling the holes needed and started sanding and polishing
haric said sand and polish, so spent the afternoon sanding to get most of the machine marks out on the sides etc,
top of box after first polish,
top section just placed on top of bottom section,
first polish versus just sanded/smoothed,
thanks hariclooking good paul!
") , cant do too much on the top cos don't wanna spolil the kraken logo,,
, cant do too much on the top cos don't wanna spolil the kraken logo,,pmsl doug, how many replies ?Looking good spents
To banana
All jokes aside good job
Looking good spents
To banana
All jokes aside good job
 ,,
,, .,,
.,, ,
,
 ,,
,,


 before I couldn't see the dent
 ........ scuff is up again so the dent goes away
I think you got a dent in your brainLooks awsome
thanks haricwow! That came out great Paul!
, yeh it buffed up quite well didnt it  ,
,pmsl doug , yeh i'll give it a scuff thenLooks awsome
,, Yeah jus fuken with yathanks haric
and thanks again hari
pmsl doug , yeh i'll give it a scuff then
nah, the dents too deep to rub out doug, and its in such a place that it cant be tapped out from behind,
i can live with it, haric did me a solid with this batt box and one tiny dent is a small blemish on an otherwise spot on part
looks awsome 
yeh i know you were dougYeah jus fuken with ya
,,,,

lol kev, not a silly question at all mateSpents I'm going to ask a silly question, be kind.
Can you not lift the servo up and use some spacers to move the cable clear of the pivot?
,,thanks johnLooks like itbwill work to me
,yeh gonna have a looksy in a minute kev and see if theres a better way etcI was only meaning about 2mm after looking at your pic's for clearance of throttle/brake linkages.
Nowt worse than chafing cables, especially on silly expensive servo's lol.
,, i'm never happy
 thats another option i'm gonna look at then sean,I kinda routed mine around the back of the servo and towards the box. Kinda a crap way to do it, but doesn't seem to be an issue.
,It looks ok Paul, but I get what you mean about the bending radius of the cable. If you want to put less stress on the cable you could route it upwards towards the bracket, then left and around the side of the servo. Keeping it flat of course.right, opinions please
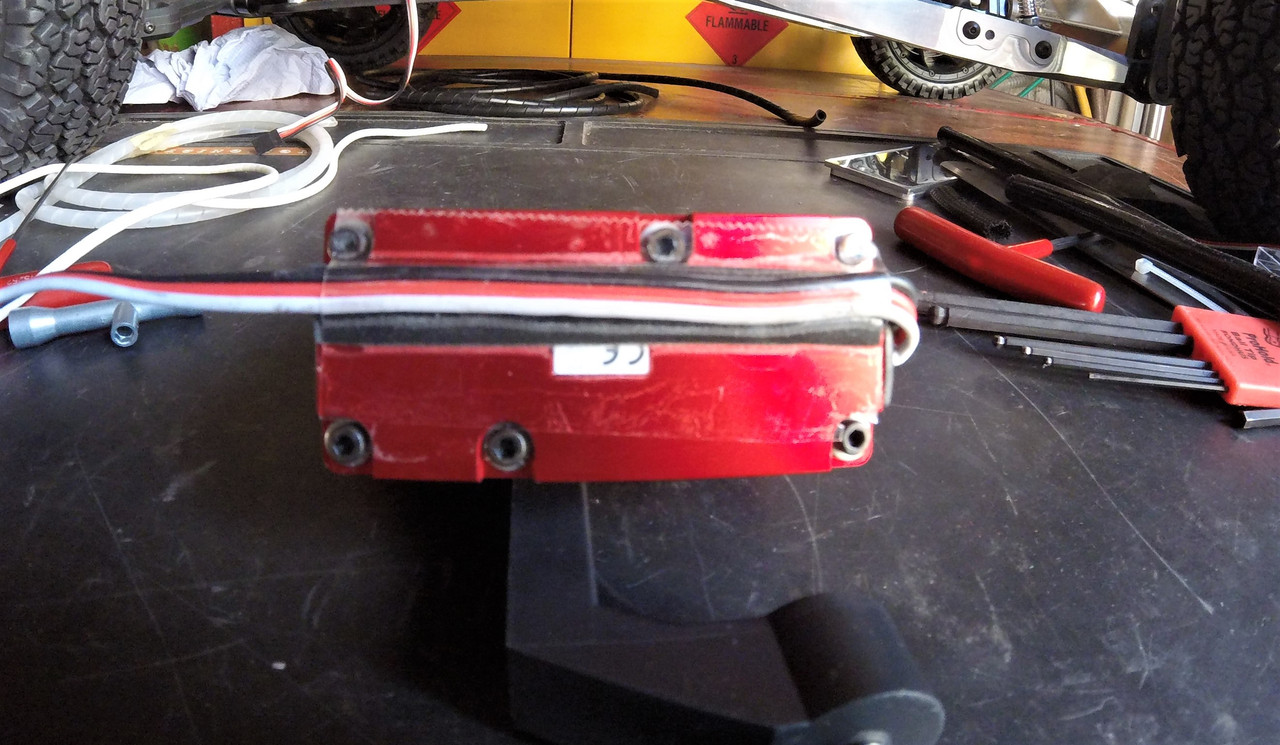
i have an obsession about snagging servo wires etc
and the vekta is a pain when it comes to the throttle servo wire,
the wire sticks out at the rear where the suspension link is like this,
i know everyone with a vekta will have had the same issue,
so i've tried nylon sheath, spiral wrap etc etc, and all that does is make everything too tight and moves the point where the wires strained the most right where it enters the servo,
so i did this below, double sided taped the wire to the bottom of the servo then gorilla clear taped over the top,
also added some cushioning to the front of the upright where the wire passes close by,
now looks like this with the servo back in there,
do you fellas think this will be ok ?
or do ya think i have too tight a turn in the sire where it exits the servo ?
not always that easy though junkieif yer that concerned over chafing, put some heat shrink over the wire
,,doing it the sean way milesIt looks ok Paul, but I get what you mean about the bending radius of the cable. If you want to put less stress on the cable you could route it upwards towards the bracket, then left and around the side of the servo. Keeping it flat of course.
That way each bend is no more than 90 degrees, even less if you leave a couple of mm of slack for each bend.
If your cable is gonna fail it will be at the 180 degree bend I reckon. Should be fine though.
,Register and gain access to Discussions, Reviews, Tech Tips, How to Articles, and much more - on the largest Large Scale RC community for RC enthusiasts that covers all aspects of the Large Scale RC!
Register Today It's free! This box will disappear once registered!

